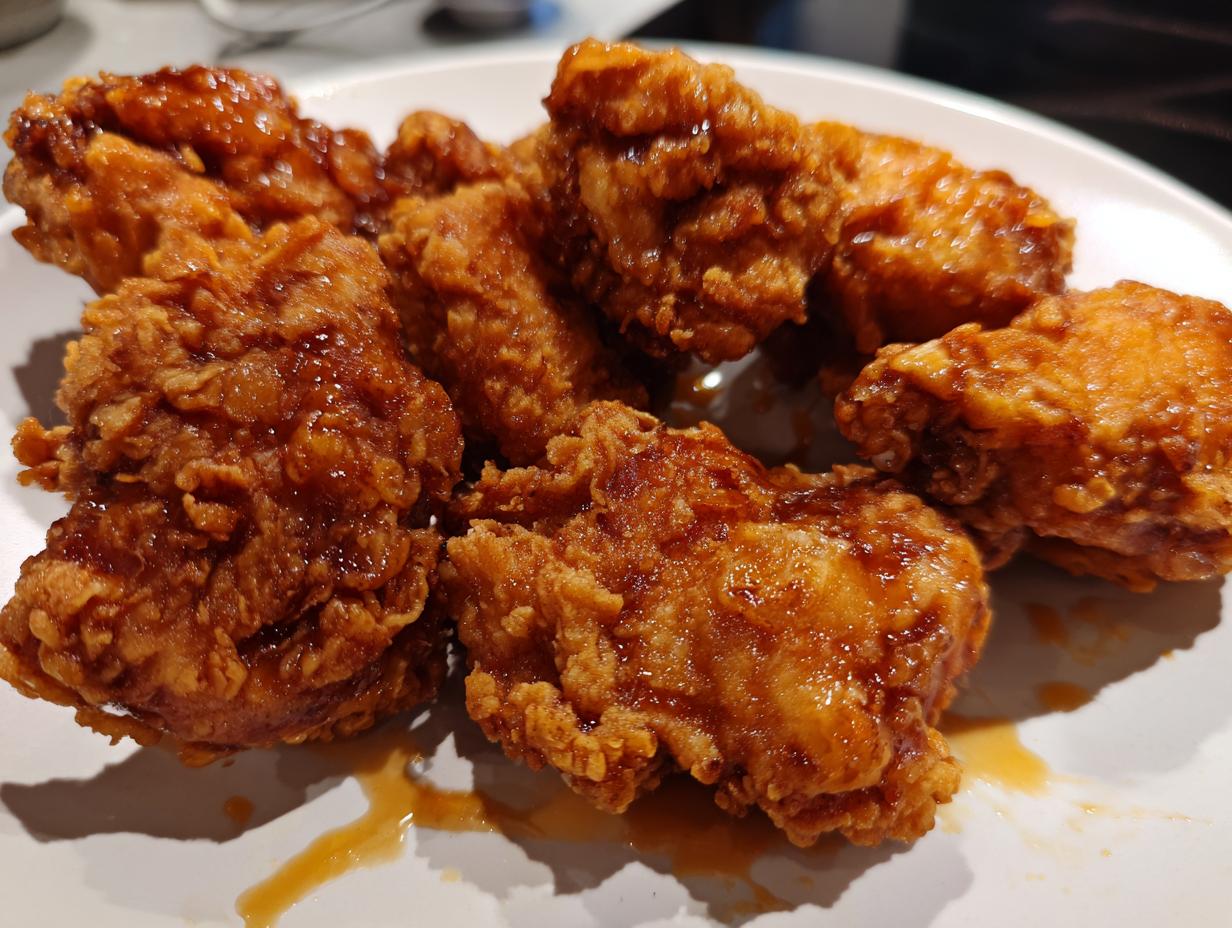
Oh my gosh, you have to try these crunchy garlic cheesy beef potato skins – they’re my absolute go-to when I need something that’ll disappear off the platter in seconds! I first made them for my husband’s poker night last year, and let me tell you, those guys acted like I’d invented the wheel. The magic happens when crispy potato skins meet juicy seasoned beef, gooey melted cheese, and that irresistible garlic-parsley crunch on top. It’s that perfect combo of textures and flavors that makes you keep reaching for “just one more.”
What I love most (besides how easy they are) is how the garlic scent fills your kitchen while they bake – it’s downright intoxicating. These aren’t your average potato skins; they’re loaded with flavor in every bite and sturdy enough to hold all those delicious toppings without falling apart. Trust me, once you try this version, you’ll never go back to plain old skins again!

Why You’ll Love These Crunchy Garlic Cheesy Beef Potato Skins
Let me count the ways these potato skins will steal your heart (and probably your appetite):
- That CRUNCH: The double-baked skins get perfectly crisp while staying sturdy enough to hold all the goodies
- Flavor bomb: Between the garlicky beef, melted cheese, and fresh parsley topping, every bite packs serious flavor
- Easy to customize: Swap in your favorite toppings – I’ve done everything from jalapeños to blue cheese crumbles
- Crowd pleaser: These disappear faster than you can say “game day snack” – I always make double batches!
- Secretly simple: Basic ingredients transform into something special with just a little TLC
Ingredients for Crunchy Garlic Cheesy Beef Potato Skins
Here’s your grocery list for these flavor-packed potato skins – simple ingredients that work some serious magic together:
- 4 large russet potatoes, scrubbed clean (look for oval-shaped ones with thick skins)
- 1 tbsp olive oil (for that perfect crispy exterior)
- 1/2 lb ground beef, 80/20 blend works best for flavor
- 1 tsp salt (I use kosher salt for even seasoning)
- 1/2 tsp black pepper, freshly cracked if you’ve got it
- 1 tsp garlic powder (our first garlic punch!)
- 1/2 tsp onion powder (the secret flavor booster)
- 1 cup shredded cheddar cheese, sharp for maximum flavor
- 2 tbsp butter, melted (this is the crunch-maker!)
- 2 cloves garlic, minced (fresh is non-negotiable here)
- 2 tbsp chopped fresh parsley (brightens up all that richness)
- 1/4 cup sour cream (optional, but oh-so-good for dipping)
Ingredient Notes & Substitutions
While I swear by the original combo, here’s how to tweak things when needed:
- Ground beef alternatives: Turkey, chicken, or even plant-based crumbles work – just add extra seasoning
- Cheese swaps: Pepper jack for spice lovers, mozzarella for extra stretch, or gouda for something different
- Vegan version: Use plant-based butter, cheese, and meat alternatives – but don’t skip the fresh garlic!
- Potato pick: Russets are best for sturdy skins, but sweet potatoes make a fun twist (reduce bake time)
- Garlic emergency? Use 1/2 tsp garlic salt instead of regular salt if you’re out of fresh cloves
Pro tip: That fresh garlic-parsley topping is what takes these from good to “OH MY GOSH” – don’t be tempted to use garlic powder there!
Equipment You’ll Need
Don’t worry—you won’t need any fancy gadgets for these potato skins! Here’s the simple lineup from my kitchen to yours:
- Baking sheet – A standard half-sheet pan works perfectly
- Fork – For poking those potatoes before their oven time
- Mixing bowl – Just a medium one for tossing the garlic-parsley magic
- Skillet – My trusty cast iron does the job for browning the beef
- Brush – A pastry brush (or even a folded paper towel) for butter application
- Sharp knife – To halve the potatoes without squashing them
- Spoon – For scooping out the fluffy potato insides (save those for mashed potatoes!)
That’s it! No special tools required—just good old-fashioned kitchen basics. Now let’s get those skins crispy!
How to Make Crunchy Garlic Cheesy Beef Potato Skins
Alright, let’s get down to business! Making these potato skins is easier than you think – I’ll walk you through each step like we’re cooking together in my kitchen. The secret? Patience with the potatoes and not skimping on that garlic butter. Here’s exactly how I make them every time:
Step 1: Bake the Potatoes
First things first – preheat that oven to 400°F (200°C). While it’s heating up, give your russet potatoes a good scrub under running water (no one wants dirt in their skins!). Dry them thoroughly with a kitchen towel – this helps the skins get extra crispy.
Now, take a fork and poke each potato about 8 times all over. This lets steam escape so they don’t explode (yes, that can actually happen – ask me how I know!). Rub them all over with olive oil – just enough to make them glisten – and place them right on the oven rack. Bake for 45-50 minutes until they’re fork-tender. You’ll know they’re ready when a knife slides in easily with no resistance.
Step 2: Cook the Seasoned Beef
While the potatoes are working their magic in the oven, let’s tackle the beef filling. Heat a skillet over medium heat and add your ground beef. Break it up with a wooden spoon as it cooks – we want nice small crumbles. When there’s no more pink (about 5-7 minutes), drain off most of the grease but leave about a tablespoon for flavor.
Now comes the seasoning! Sprinkle in the salt, pepper, garlic powder, and onion powder. Stir everything together and let it cook for another minute – you should smell all those flavors coming together beautifully. Take it off the heat and set aside – we’ll come back to this deliciousness soon.
Step 3: Assemble and Crisp the Skins
When the potatoes are cool enough to handle (but still warm), cut them in half lengthwise. Here’s where you need a gentle touch – use a spoon to scoop out most of the flesh, leaving about 1/4 inch attached to the skin. Save that fluffy potato interior for mashed potatoes or another recipe!
Now, the secret to that perfect crunch: brush both sides of each potato skin with melted butter. Yes, both sides! Place them skin-side up on a baking sheet and pop them back in the oven for 5 minutes. Flip them over, fill each one with that seasoned beef we made earlier, then top generously with shredded cheese. Bake for another 5-7 minutes until the cheese is gloriously melted and bubbly.

Step 4: Add the Garlic Topping
While the skins are getting all cheesy and wonderful, mix together your minced garlic and chopped parsley in a small bowl. As soon as the skins come out of the oven, sprinkle this fresh mixture over the top – the residual heat will soften the garlic just enough to take away the harsh bite while keeping that amazing flavor.
And voila! You’ve just made the most irresistible potato skins. Let them cool for just a minute (if you can resist) so the cheese sets slightly, then serve them up with sour cream on the side for dipping. Warning: these disappear FAST, so grab one for yourself before they’re all gone!
Tips for Perfect Crunchy Garlic Cheesy Beef Potato Skins
After making these potato skins more times than I can count (and fielding all the recipe requests from friends), I’ve picked up some game-changing tricks that’ll take yours from good to “can I have the recipe?” amazing:
Broil for the ultimate crunch: Want that next-level crispiness? After the final bake, switch your oven to broil for just 1-2 minutes – watch them like a hawk though! The cheese gets beautifully bubbly and the edges turn golden brown. My husband calls this the “chef’s kiss” step.
Freshly grate your cheese: I know, I know – pre-shredded is convenient. But trust me, the anti-caking agents in bagged cheese make it melt weirdly. Take the extra minute to grate a block of cheddar – you’ll get that perfect oozy texture instead of a rubbery layer.
Dry those skins thoroughly: After scooping out the potato flesh, pat the insides with a paper towel. Any leftover moisture is the enemy of crispiness! This little step makes all the difference between soggy and snappy skins.
Don’t overcrowd the pan: Give each potato skin some breathing room on the baking sheet. If they’re all crammed together, they’ll steam instead of crisp up. I usually do two batches if I’m making a lot – worth the extra few minutes!
The butter brush secret: When brushing the skins with melted butter, get into all the nooks and crannies – especially the edges. Those buttered bits turn into the most delicious crispy corners that everyone fights over.
Make ahead magic: You can bake and scoop the potatoes up to a day ahead, then store them covered in the fridge. Just bring them to room temp before the final bake – they’ll crisp up even better this way!
Remember, the best potato skins walk that perfect line between crispy and sturdy. Follow these tips and you’ll nail that texture every time. Now go forth and make the most irresistible potato skins of your life!
Serving Suggestions
Okay, let me tell you how to turn these already-amazing potato skins into a full-on snack spread that’ll have everyone raving! First – the dipping situation. Sure, sour cream is classic (I always put out a big dollop on the side), but my friends go wild when I serve them with:
- Cool & creamy: Ranch dressing, chipotle mayo, or even a quick avocado crema
- Extra zing: Salsa verde or pico de gallo for freshness
- Heat lovers: A drizzle of hot honey or sriracha for that sweet-spicy kick
For parties, I like to set up a “potato skin bar” with little bowls of extra toppings – crumbled bacon, pickled jalapeños, green onions – so everyone can customize. It’s such a fun way to serve them!
These potato skins are basically my secret weapon for:
- Game day: They disappear faster than chips during football Sundays
- Girls’ night: Pair with margaritas for the ultimate girls’ night snack
- Potlucks: I transport them on a parchment-lined sheet pan – always come home empty
- Movie nights: Way better than theater food (and cheaper too!)
For a more complete meal, I’ll serve them with a simple green salad drizzled with lemon vinaigrette to cut through the richness. My kids love when I make mini versions for lunch with carrot sticks on the side. Honestly though? These are so darn satisfying, they rarely need accompaniment – just plenty of napkins!
Storage & Reheating
Now, let’s talk about what to do with leftovers – though in my house, that’s usually not a problem! If you somehow end up with extra potato skins (bless you for your self-control), here’s how to keep them tasting their best:
Fridge storage: Let the skins cool completely, then store them in an airtight container with parchment between layers. They’ll keep for up to 3 days, though the garlic topping is best fresh. Pro tip – leave the sour cream off if you’re planning to store them!
Reheating magic: To bring back that signature crunch, skip the microwave (unless you like soggy skins – no judgment!). Instead, pop them on a baking sheet in a 375°F oven for about 10 minutes. If they’re looking dry, a quick brush of melted butter before reheating works wonders. For an extra crisp top, finish with 1 minute under the broiler.
Freezer option: You can freeze the assembled-but-unbaked skins before adding the garlic topping. Just wrap tightly and freeze for up to a month. When ready, bake straight from frozen – they’ll need about 15-20 minutes at 400°F. Add the fresh garlic-parsley mix right before serving.
Honestly though? These taste best fresh from the oven while the cheese is still gooey and the garlic is fragrant. My advice? Invite some friends over and enjoy them right away – they’ll thank you for it!

FAQs About Crunchy Garlic Cheesy Beef Potato Skins
I get asked about these potato skins ALL the time – here are the most common questions (and my tried-and-true answers!):
Can I use sweet potatoes instead of russets?
Absolutely! Sweet potatoes make a delicious twist – just reduce the initial bake time to about 35-40 minutes since they cook faster. The flavor pairs amazingly with the beef and cheese, though the skins won’t get quite as crispy.
How do I make a vegetarian version?
Easy peasy! Swap the beef for sautéed mushrooms, black beans, or plant-based crumbles. Amp up the seasonings and maybe add a pinch of smoked paprika for that meaty depth. All the other steps stay the same!
Can I prep these ahead of time?
You bet! Bake and scoop the potatoes up to a day in advance – store them covered in the fridge. When ready, let them come to room temp before the butter brushing and final bake. The garlic topping should always be added fresh though!
Why do my potato skins turn out soggy?
Three likely culprits: 1) Not drying the scooped-out skins enough, 2) Overcrowding the baking sheet, or 3) Skipping that crucial second bake before adding toppings. Also – make sure your oven temp is accurate!
What’s the best cheese to use?
Sharp cheddar is my go-to for its flavor and meltability, but pepper jack adds nice heat, and gouda brings a smoky note. For maximum stretch, mix in some mozzarella. Just avoid pre-shredded cheeses – they don’t melt as smoothly.
Nutritional Information
Okay, let’s chat about the nutritional side of these indulgent little bites – because let’s be real, we’re not eating potato skins for our health! While I’m all about balance, these are definitely a “sometimes treat” in my book. The numbers below are estimates based on my exact recipe, but keep in mind they’ll vary depending on your specific ingredients and how generously you stuff those skins!
Each loaded potato skin comes in around 220 calories, with most coming from that glorious combo of beef, cheese, and buttery potato goodness. They’ve got a decent protein punch from the beef and cheese (about 10g per skin), which helps balance out the carb content from those crispy potato shells.
Now, I’m not a nutritionist – just a home cook who likes to know what I’m eating! If you’re tracking macros or have dietary concerns, definitely plug the exact ingredients you use into your favorite nutrition calculator. The values can swing pretty wildly depending on things like:
- How lean your ground beef is
- Whether you use full-fat or reduced-fat cheese
- How much butter you brush on those skins (no judgment either way!)
- Whether you add optional toppings like extra sour cream
My philosophy? Enjoy a couple of these flavor-packed skins mindfully with some veggies on the side, and savor every crispy, cheesy bite without stressing about the numbers too much. Life’s too short not to enjoy good food shared with great company!
I’d love to hear how your crunchy garlic cheesy beef potato skins turn out! Did you add any fun twists? Maybe some jalapeños for heat or swapped the beef for chorizo? Drop a comment below and tell me all about your kitchen adventures with this recipe. And if you snapped a photo of your golden, crispy creations, share it with me – nothing makes me happier than seeing your delicious results! Whether it’s your first time making potato skins or you’re a seasoned pro, I’m always here to answer questions and celebrate your cooking wins. Now go enjoy those crispy, garlicky bites – you’ve earned them!
Print
Irresistible Crunchy Garlic Cheesy Beef Potato Skins Recipe
Crispy potato skins stuffed with seasoned beef, melted cheese, and a crunchy garlic topping. Perfect as an appetizer or snack.
- Total Time: 75 minutes
- Yield: 8 potato skins 1x
Ingredients
- 4 large russet potatoes
- 1 tbsp olive oil
- 1/2 lb ground beef
- 1 tsp salt
- 1/2 tsp black pepper
- 1 tsp garlic powder
- 1/2 tsp onion powder
- 1 cup shredded cheddar cheese
- 2 tbsp butter
- 2 cloves garlic, minced
- 2 tbsp chopped parsley
- 1/4 cup sour cream (optional)
Instructions
- Preheat oven to 400°F (200°C). Scrub potatoes, dry them, and prick with a fork.
- Rub potatoes with olive oil and bake for 45-50 minutes until tender.
- While potatoes bake, cook ground beef in a pan over medium heat. Season with salt, pepper, garlic powder, and onion powder. Drain grease and set aside.
- Once potatoes are done, cool slightly, then cut in half lengthwise. Scoop out most of the flesh, leaving a thin layer.
- Place potato skins on a baking sheet, brush with melted butter, and bake for 5 minutes to crisp.
- Fill each skin with seasoned beef, top with shredded cheese, and bake for 5-7 minutes until cheese melts.
- In a small bowl, mix minced garlic and chopped parsley. Sprinkle over the potato skins.
- Serve hot with sour cream if desired.
Notes
- For extra crispiness, broil the potato skins for 1-2 minutes after adding cheese.
- Use leftover mashed potatoes to make another dish.
- Customize toppings with jalapeños, bacon, or green onions.
- Prep Time: 15 minutes
- Cook Time: 60 minutes
- Category: Appetizer
- Method: Baking
- Cuisine: American
- Diet: Low Lactose
Nutrition
- Serving Size: 1 potato skin
- Calories: 220
- Sugar: 2g
- Sodium: 300mg
- Fat: 12g
- Saturated Fat: 6g
- Unsaturated Fat: 4g
- Trans Fat: 0g
- Carbohydrates: 18g
- Fiber: 2g
- Protein: 10g
- Cholesterol: 35mg