Let me tell you about the first time I tried making a chocolate pie crust – it was pure magic, and honestly, a bit of a happy accident! I’d been craving something decadent for a summer pie, but regular crust just wasn’t cutting it. That’s when I thought, “Why not make it chocolate?” I’ll never forget how the rich cocoa aroma filled my tiny apartment kitchen as I rolled out that dark, crumbly dough. The best part? It’s ridiculously easy to make – just a handful of pantry staples transformed into something extraordinary.
This chocolate pie crust recipe has become my go-to for everything from silky chocolate cream pies to tangy lemon fillings (trust me, the contrast is amazing). There’s something about that deep cocoa flavor combined with buttery richness that elevates any dessert. And don’t get me started on how impressed guests are when you tell them you made the crust from scratch!
What I love most is how forgiving this recipe is. Even my first attempt, when I was convinced I’d messed up by adding too much water, turned out perfect – crisp yet tender, with just the right chocolate intensity to complement fillings without overpowering them. Once you try homemade chocolate pie crust, you’ll never go back to store-bought.
Why You’ll Love This Chocolate Pie Crust
Oh friend, let me count the ways this chocolate pie crust will steal your heart! I still remember the first time I took a bite of pie with this crust – it was like my dessert world expanded overnight. Here’s what makes it so special:
- Rich chocolate flavor that doesn’t quit – The cocoa powder gives it deep, luxurious taste that makes every bite feel indulgent
- Surprisingly easy to make – No fancy techniques needed, just simple mixing and chilling (even beginners nail this!)
- Plays well with all sorts of fillings – From creamy chocolate to tart berries, this crust complements everything beautifully
- That perfect texture – Crisp yet tender, holding its shape without being tough
- Instant wow factor – Nobody expects a homemade chocolate crust, and the dark color looks stunning
I’ve used this recipe for everything from Thanksgiving pies to quick weeknight desserts, and it never disappoints. Once you try it, you’ll understand why it’s become my desert island baking essential!
The Simple Ingredients That Make Magic
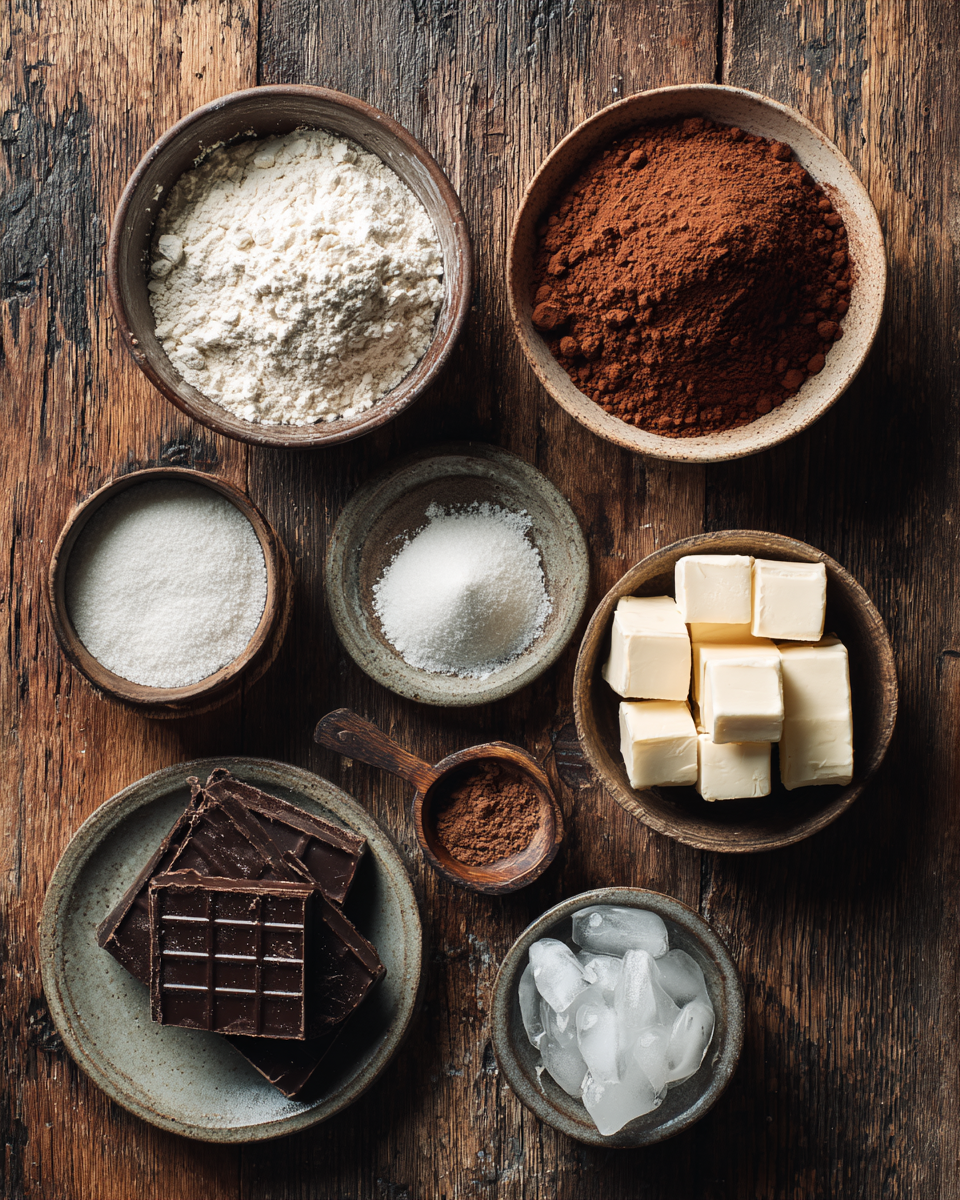
Here’s the beautiful thing about this chocolate pie crust – it only needs a few basic ingredients, but they make all the difference. I’ve learned through trial and error (and one memorable pie disaster) that quality matters here:
- 1 1/4 cups all-purpose flour – Spooned and leveled, please! Packing it gives you a tough crust
- 1/4 cup cocoa powder – Use the good stuff! Dutch-processed gives deeper flavor, but natural works too
- 1/4 cup granulated sugar – Just enough to balance the cocoa’s bitterness
- 1/2 teaspoon salt – Trust me, it makes the chocolate flavor pop
- 1/2 cup unsalted butter – Cold and cubed (I pop it in the freezer for 15 minutes first)
- 3-4 tablespoons ice water – Key word: ice water! I keep a glass of water with ice cubes nearby
See? Nothing fancy, but when these simple ingredients come together, they create something extraordinary. The cold butter is non-negotiable though – I learned that the hard way when my summer kitchen was too warm!
Equipment Needed
You don’t need fancy gadgets for this chocolate pie crust – just a few basic tools I bet you already have! Here’s my go-to set:
- Large mixing bowl (I use my grandmother’s old ceramic one – sentimental and practical!)
- Pastry cutter or two forks (or your clean hands in a pinch)
- Rolling pin (a wine bottle works in emergencies – been there!)
- 9-inch pie dish
- Plastic wrap for chilling
That’s it! See? No special equipment needed for this chocolatey magic.
How to Make Chocolate Pie Crust
Alright, let’s get to the good stuff! Making this chocolate pie crust is like a little kitchen dance – simple steps that create something magical. Follow along and you’ll have the most delicious chocolate crust in no time.
Mixing the Dry Ingredients
First, grab your biggest mixing bowl – this is where the magic starts! Whisk together the flour, cocoa powder, sugar, and salt until they’re completely combined. I like to sift the cocoa powder first to avoid lumps (learned that after one lumpy crust incident!). The mixture should look like rich, chocolaty sand when it’s ready.
Incorporating the Butter
Now for the fun part – the butter! Take your ice-cold cubes and work them into the dry mix using a pastry cutter or two forks. You want to keep going until the mixture looks like coarse crumbs with some pea-sized butter pieces remaining. Pro tip: if your hands get too warm, pop the bowl in the fridge for 5 minutes – cold butter is key!
Adding Ice Water
Here’s where patience pays off. Sprinkle in the ice water one tablespoon at a time, gently mixing after each addition. The dough should just come together when you pinch it – not too sticky, not too dry. I usually need about 3 1/2 tablespoons, but every kitchen’s different. When it holds together in a ball, you’re golden!
Chilling and Rolling the Dough
Shape your dough into a disk (this makes rolling easier later), wrap it in plastic, and chill for at least 30 minutes. This resting time is crucial – it relaxes the gluten and firms up the butter for perfect texture. When ready, roll it out on a lightly floured surface to about 12 inches diameter. Don’t worry about perfection – rustic is charming! Gently transfer to your pie dish, trim the edges, and crimp however you like. Prick the bottom all over with a fork to prevent bubbles.
Baking the Chocolate Pie Crust
Pop your prepared crust into a preheated 375°F oven for 15-20 minutes. You’ll know it’s done when it’s set and smells amazing. Let it cool completely before adding any fillings – I know, the waiting is hard, but it’s worth it! Now you’ve got the perfect chocolate foundation for any pie your heart desires.
Tips for Perfect Chocolate Pie Crust
After making this chocolate pie crust more times than I can count (and learning from plenty of mistakes!), here are my can’t-miss tips for foolproof results every time:
- Quality cocoa is everything – Splurge on good Dutch-process cocoa powder for that deep, rich chocolate flavor you’re craving
- Keep everything cold, cold, cold – I even chill my flour and bowl sometimes when my kitchen’s warm
- Blind bake for wet fillings – Line the crust with parchment and pie weights (or dried beans!) to prevent soggy bottoms
- Don’t overwork the dough – Mix just until it comes together for the tenderest crust
- Freeze extra dough – Wrap tightly and it’ll keep for months – future you will be so grateful!
Trust me, these little tricks make all the difference between good and “Oh my gosh, you made this?!” level chocolate pie crust.
Variations and Serving Suggestions
Oh, the possibilities with this chocolate pie crust are endless! Here are some of my favorite ways to jazz it up:
- Classic chocolate cream – Fill it with silky chocolate pudding and top with whipped cream for pure decadence
- Peanut butter dream – Spread a layer of creamy peanut butter before adding banana slices and custard
- Berry explosion – Fresh raspberries or strawberries with a drizzle of chocolate ganache? Yes please!
- Salted caramel delight – The salty-sweet combo against the chocolate crust is absolute perfection
- Mint chocolate – Add a drop of peppermint extract to the crust for a refreshing twist
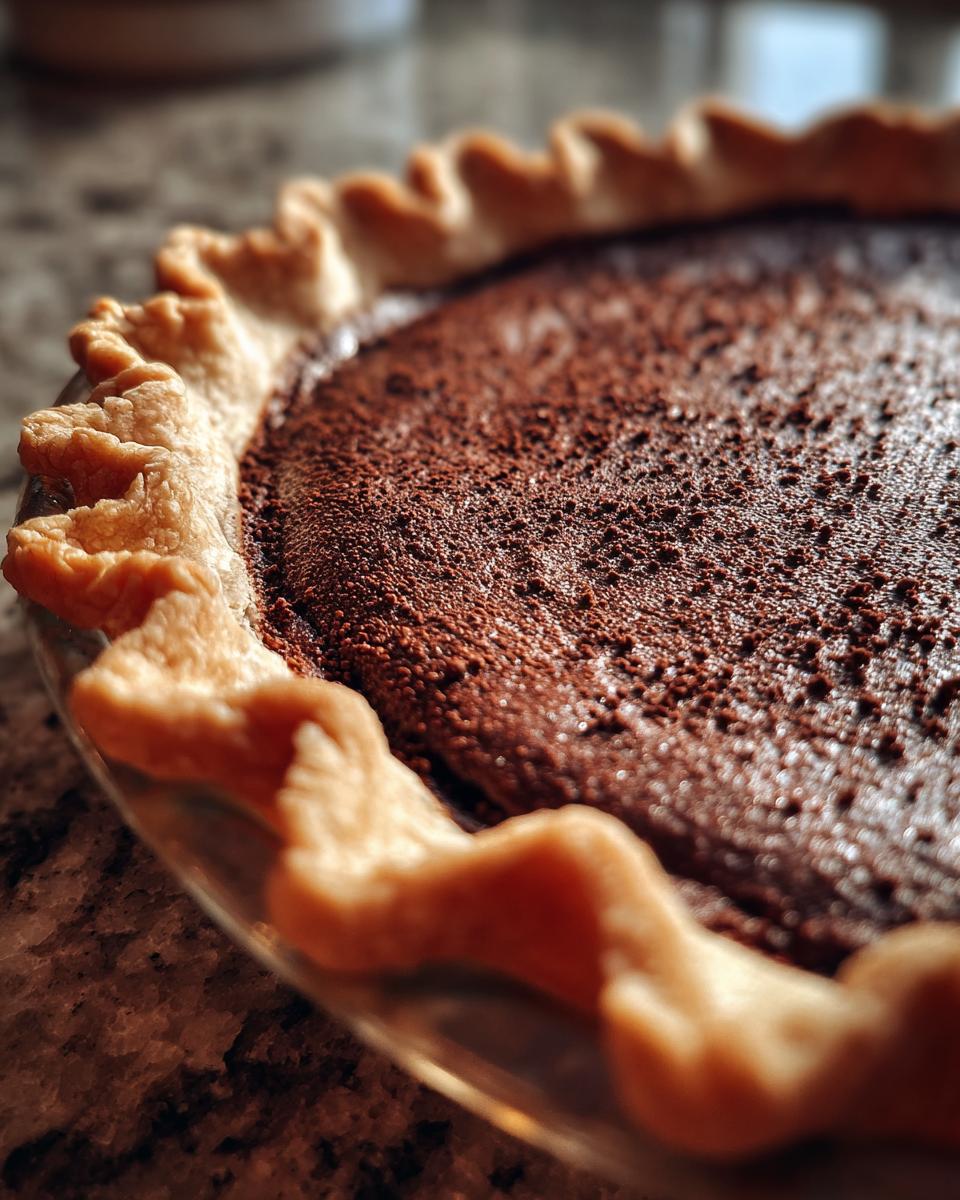
For extra flair, I love dusting the rim with powdered sugar or drizzling melted chocolate in pretty patterns. Sometimes I’ll even press crushed cookies or nuts into the crimped edges before baking – it’s all about having fun with it!
Storing and Reheating
Here’s the good news – this chocolate pie crust keeps beautifully! For baked crusts, just wrap tightly in plastic and store at room temperature for 2-3 days. Need it longer? Freeze it for up to 3 months – no thawing needed, just pop it straight into a 350°F oven for 5 minutes to crisp up again. Raw dough? That freezes like a dream too – wrap the disk well and freeze for later baking. Future you will be so happy!
Nutritional Information
Okay, let’s be real – we’re not eating chocolate pie crust for its health benefits! But for those keeping track, here’s the scoop:
- About 180 calories per slice (1/8 of crust)
- 11g fat (7g saturated)
- 20g carbs
- 1g fiber
- 6g sugar
Remember, these are estimates and can vary based on your specific ingredients. I use full-fat butter and quality cocoa, so mine might be slightly richer than what’s listed here. But hey – life’s short, eat the good crust!
Frequently Asked Questions
Q1. Can I use melted butter instead of cold cubed butter?
Oh honey, I know it’s tempting to skip the chilling step, but resist! Cold butter is the secret to that perfect flaky texture. Melted butter makes the crust greasy and tough – learned that the hard way during one very sad pie experiment. Stick with ice-cold cubes you cut in for best results.
Q2. How long does the baked chocolate pie crust keep?
Your delicious creation will stay fresh at room temperature for 2-3 days if wrapped tight. But here’s my pro tip – freeze it! A fully baked crust freezes beautifully for up to 3 months. Just pop it straight from freezer to oven for 5 minutes at 350°F to bring back that crispness.
Q3. Can I make this crust gluten-free?
Absolutely! I’ve successfully swapped the all-purpose flour for a 1:1 gluten-free blend with great results. The texture’s slightly more delicate, so handle gently when rolling. Bonus – the chocolate flavor hides any “GF” taste perfectly. Just be sure your cocoa powder is gluten-free too!
Q4. Why does my crust shrink while baking?
Ah, the dreaded shrink! Happens when the gluten gets overworked or the dough isn’t chilled enough. My foolproof fix? After rolling and fitting into the pan, chill it again for 15 minutes before baking. And don’t stretch the dough when placing it – let it relax naturally into the dish.
Q5. Can I add nuts or other mix-ins to the dough?
Ooh, creative thinking! I love pressing crushed nuts or cookie crumbs into the crimped edges. For mix-ins, keep them small (finely chopped) and use no more than 1/4 cup total, or the dough won’t hold together well. My favorite? Toasted hazelnuts with the chocolate – tastes like Ferrero Rocher in crust form!
Divine 3-Ingredient Chocolate Pie Crust You’ll Adore
- Total Time: 35 minutes
- Yield: 1 pie crust (9-inch) 1x
- Diet: Vegetarian
Description
A rich and buttery chocolate pie crust that adds a delicious depth of flavor to any pie filling. Perfect for chocolate lovers.
Ingredients
- 1 1/4 cups all-purpose flour
- 1/4 cup cocoa powder
- 1/4 cup granulated sugar
- 1/2 teaspoon salt
- 1/2 cup unsalted butter, cold and cubed
- 3–4 tablespoons ice water
Instructions
- In a bowl, whisk together flour, cocoa powder, sugar, and salt.
- Cut in the cold butter until the mixture resembles coarse crumbs.
- Add ice water, one tablespoon at a time, mixing until the dough comes together.
- Shape the dough into a disk, wrap in plastic, and chill for 30 minutes.
- Roll out the dough on a floured surface and fit it into a pie dish.
- Trim and crimp the edges, then prick the bottom with a fork.
- Bake at 375°F for 15-20 minutes until set. Let it cool before filling.
Notes
- Use high-quality cocoa powder for the best flavor.
- Keep the butter and water cold for a flaky texture.
- Blind bake the crust if using a wet filling.
- Prep Time: 15 minutes
- Cook Time: 20 minutes
- Category: Dessert
- Method: Baking
- Cuisine: American
Nutrition
- Serving Size: 1 slice (1/8 of crust)
- Calories: 180
- Sugar: 6g
- Sodium: 150mg
- Fat: 11g
- Saturated Fat: 7g
- Unsaturated Fat: 3g
- Trans Fat: 0g
- Carbohydrates: 20g
- Fiber: 1g
- Protein: 2g
- Cholesterol: 30mg

