You know those moments when hunger strikes and you need something delicious fast? That’s when my mini pizzas save the day! These little flavor bombs have been my go-to snack for years – perfect for last-minute sleepovers, game nights, or when my niece and nephew come over begging for “Auntie’s special pizza.” I’ve been perfecting pizza recipes since my college days working at a pizzeria (15 years ago – yikes!), and these mini versions are hands-down the most fun to make.
The magic? You can top them with absolutely anything! I remember one chaotic family reunion where I set up a “make-your-own” mini pizza bar – my vegetarian cousin piled on roasted veggies while my meat-loving brother went full pepperoni explosion. Within minutes, everyone was happily munching away. That’s the beauty of mini pizzas – they’re like edible canvases for your cravings.
What I love most is how they take less than 30 minutes start-to-finish, but taste like you spent hours in the kitchen. The crispy edges, the melty cheese, that first bite when all the flavors hit just right… pure magic. Whether you’re feeding picky kids or hosting a casual get-together, these mini pizzas never fail to delight.
Why You’ll Love These Mini Pizzas
Listen, I’m not exaggerating when I say these mini pizzas will become your new kitchen superhero. Here’s why everyone in my life keeps begging me to make them:
- Faster than takeout: From fridge to table in under 30 minutes – perfect for those "I forgot to plan dinner" emergencies (we’ve all been there!)
- Kid-approved magic: Even my pickiest niece will eat anything if it’s on a mini pizza crust – especially when she gets to choose her own toppings
- Party lifesaver: One batch makes 6 perfect individual portions, so no more awkward pizza slicing at gatherings
- Endless creativity: Breakfast pizza? Dessert pizza? Leftover surprise pizza? Your imagination (and fridge contents) are the only limits
- No special skills needed: If you can spread sauce and sprinkle cheese, you’re already a mini pizza master
Trust me, once you try these, you’ll wonder how you ever survived without them in your recipe rotation!
Ingredients for Perfect Mini Pizzas
Okay, let’s talk ingredients – because great mini pizzas start with great components! Here’s exactly what you’ll need for that perfect bite every time:
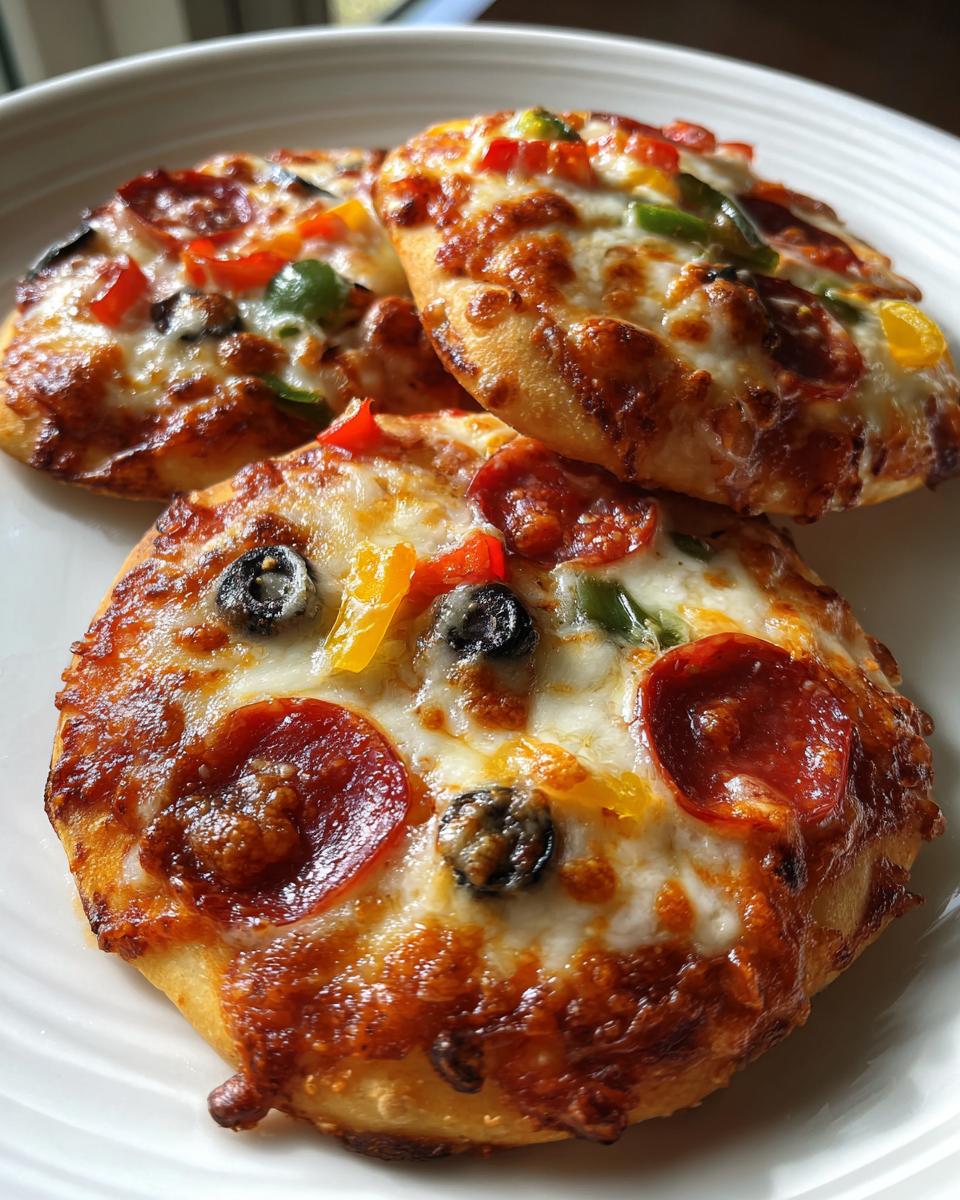
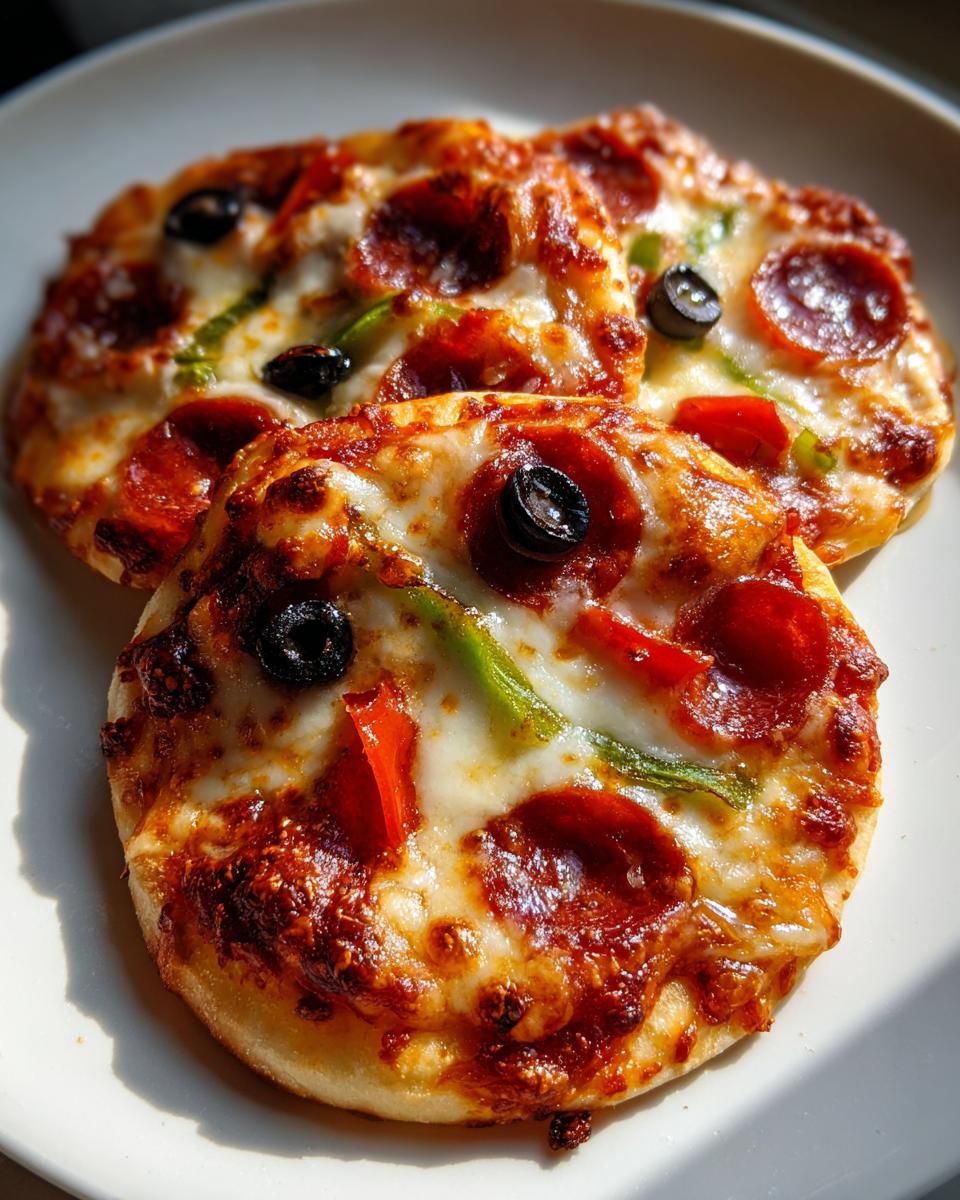
- 6 mini pizza bases (4-inch diameter) – I like the pre-made ones for convenience, but homemade works too if you’re feeling fancy
- 1/2 cup tomato sauce – packed with flavor, not too runny (my secret? I always add a pinch of garlic powder to mine)
- 1 cup packed shredded mozzarella – freshly grated melts better than pre-shredded (those anti-caking agents can be sneaky!)
- 1/2 cup sliced pepperoni – cut into quarters for perfect coverage
- 1/4 cup thinly sliced bell peppers – I prefer the red ones for sweetness
- 1/4 cup sliced black olives – drained well so they don’t make the crust soggy
- 1 tsp dried oregano – the finishing touch that makes it smell like a real pizzeria
Pro tip: Measure everything before you start – it makes assembly lightning fast!
Ingredient Substitutions
Ran out of something? No worries! Mini pizzas are all about flexibility. Here are my favorite swaps:
- Sauce alternatives: Pesto, alfredo, or even barbecue sauce make fun changes
- Cheese options: Try provolone, cheddar, or vegan cheese for dietary needs
- Meat lovers: Swap pepperoni for cooked sausage, ham, or vegetarian “pepperoni”
- Veggie variations: Mushrooms, onions, or pineapple chunks work great too
- Spice it up: Add red pepper flakes or fresh basil after baking
See? The possibilities are endless – just have fun with it!
Equipment Needed for Mini Pizzas
You won’t need fancy gadgets for these mini pizzas – just a few basics from your kitchen:
- Baking tray – A standard half-sheet pan works perfectly
- Oven mitts – Because melted cheese waits for no one!
- Cutting board – For prepping toppings
That’s it! I sometimes use parchment paper on the tray for easier cleanup, but even that’s optional. Simple tools, amazing results.
How to Make Mini Pizzas Step-by-Step
Alright, let’s get these mini pizzas from dream to reality! Follow these steps and you’ll be enjoying gooey, crispy perfection in no time:
- Preheat that oven! Set it to 375°F (190°C) – this gives it time to reach the right temperature while we prep. A properly heated oven makes all the difference for that perfect golden crust.
- Line up your pizza soldiers. Arrange all 6 mini pizza bases on your baking tray with some space between them. You want good airflow for even cooking – no overlapping!
- Sauce it up. Using the back of a spoon, spread about 1 tablespoon of tomato sauce on each base, leaving a tiny bare rim around the edge. This “border” helps prevent saucy overflow disasters.
- Cheese party time! Sprinkle that glorious mozzarella evenly over each sauced base. I like to hold some back for a final sprinkle – more on that later!
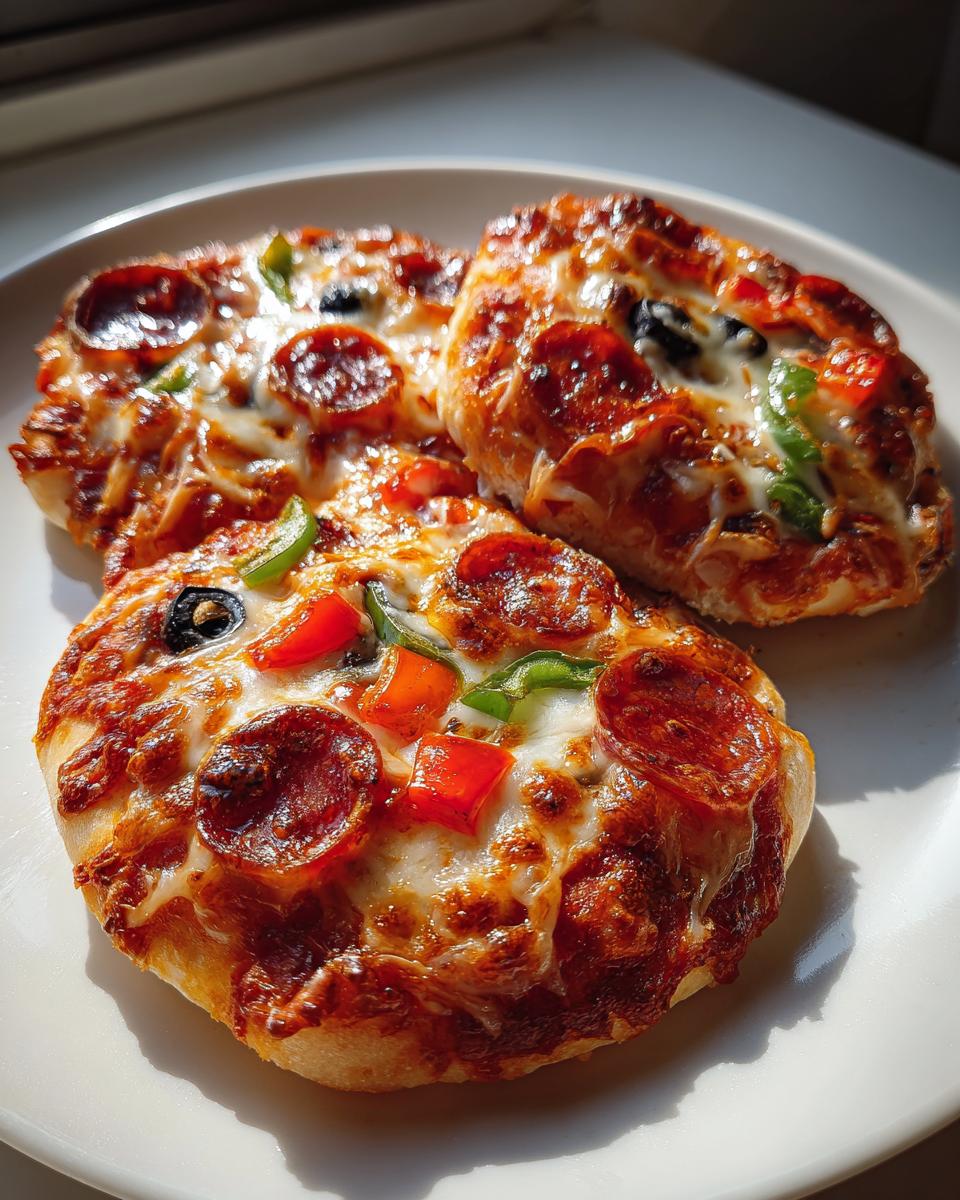
- Top it off. Now the fun part – arrange your pepperoni, bell peppers, and olives however you like. My method? Pepperoni first in a spiral, veggies tucked between.
- The finishing touches. That reserved cheese? Dust it lightly over the toppings now – it acts like glue! Then sprinkle with oregano for that authentic pizza parlor aroma.
- Bake to perfection. Slide your tray into the middle oven rack. Set a timer for 10 minutes, then watch closely for the next 2 minutes until the cheese bubbles and the edges turn that perfect golden brown.
- Rest & serve. Let them cool just 2 minutes – enough to avoid mouth burns but still enjoy that glorious melty cheese texture.
Pro Tips for Best Results
After making literally hundreds of these, here are my can’t-skip secrets:
- Use the back of a spoon to spread sauce in a spiral motion – it gives the most even coverage without tearing the delicate base
- Less is more with toppings! Overloading leads to sad, soggy pizza. Stick to 3-4 toppings max per mini pizza
- Invest in an oven thermometer – most home ovens run hot or cold. That perfect 375°F is non-negotiable!
- For extra crispness, bake directly on the oven rack for the last 2 minutes (but watch carefully!)
Follow these steps and tips, and you’ll have mini pizzas that’ll make you feel like a pizza chef extraordinaire!
Creative Mini Pizza Variations
Once you’ve mastered the basic mini pizza, it’s time to get creative! These are my three favorite theme variations that always impress guests (and keep my family from getting bored of the same old pizza):
Hawaiian Vacation
I know pineapple on pizza is controversial, but trust me – when you do it right, it’s magic! Skip the tomato sauce and use a thin layer of barbecue sauce instead. Top with shredded mozzarella, diced ham (or Canadian bacon if you’re feeling fancy), pineapple chunks, and thinly sliced red onion. The sweet-savory combo is irresistible – my husband always steals these right off the baking sheet!
Classic Margherita
For those nights when I want something simple but elegant, I go for this Italian classic. Spread with just a whisper of tomato sauce, then layer fresh mozzarella slices (the kind packed in water), halved cherry tomatoes, and fresh basil leaves. After baking, I drizzle with balsamic glaze. It tastes like a summer night in Naples!
BBQ Chicken Ranch
This is my go-to when I have leftover rotisserie chicken to use up. Mix equal parts barbecue sauce and ranch dressing for the base, then top with shredded chicken, red onion, and a blend of mozzarella and cheddar. I like to finish it with chopped cilantro after baking – the flavors are unreal!
Serving and Storing Mini Pizzas
Oh, that magical moment when your mini pizzas come out of the oven – the cheese still bubbling, the edges perfectly crisp! You’ll want to serve these beauties immediately while they’re at their absolute best. I always set them out on a big wooden board with some napkins – the “rustic” look makes everyone feel like they’re at a cozy Italian trattoria.
Got leftovers? (Though in my house, that’s rare!) Pop them in an airtight container and refrigerate for up to 2 days. When you’re ready to enjoy them again, skip the microwave (which makes them soggy) and reheat in a 350°F oven for about 5 minutes. That’ll bring back that fresh-from-the-oven crispness!
Pro tip: Freeze any unbaked topped mini pizzas on a tray first, then transfer to freezer bags. When pizza cravings strike, bake straight from frozen – just add an extra 3-4 minutes to the cooking time. Total game-changer for busy nights!
Mini Pizzas Nutrition Information
Here’s the scoop on what’s in these tasty bites – but remember, these are estimates based on my exact ingredients (your toppings may vary!). One mini pizza clocks in at about 180 calories, with 7g protein and 8g fat. They’ve got that perfect balance of carbs from the crust and nutrients from the veggie toppings. Keep in mind – adding extra cheese or meat will change the numbers, but hey, it’s pizza – worth every bite!
Mini Pizzas FAQ
I get asked about mini pizzas all the time – here are the questions that pop up most often in my kitchen (and my tried-and-true answers):
Can I freeze mini pizzas? Absolutely! My freezer always has a batch ready. The trick? Freeze them before baking. Just assemble your mini pizzas on a tray, freeze until solid (about 2 hours), then transfer to freezer bags. When cravings hit, bake straight from frozen – just add 3-4 extra minutes to the cook time.
What about gluten-free options? Easy peasy! Swap regular bases for gluten-free ones – I’ve found the 4-inch GF pizza crusts work beautifully. Just watch the baking time, as GF crusts can brown faster.
Best cheese alternatives? For dairy-free friends, vegan mozzarella shreds melt surprisingly well. My lactose-intolerant cousin swears by a mix of nutritional yeast and almond milk ricotta – sounds weird, tastes amazing!
Got more questions? Slide into my DMs – I could talk mini pizza hacks all day!
Share Your Mini Pizza Creations
Now it’s your turn to play pizza chef! I’d love to see what delicious creations you come up with – tag me @YourPizzaPal on Instagram with your mini pizza masterpieces. Nothing makes me happier than seeing your customized toppings and happy pizza faces – you might just inspire my next kitchen experiment!
Print
3-Ingredient Blissful Mini Pizzas Ready in 30 Minutes
- Total Time: 22 mins
- Yield: 6 mini pizzas 1x
- Diet: Vegetarian
Description
Quick and easy mini pizzas perfect for snacks or parties. Customize with your favorite toppings.
Ingredients
- 1 pack mini pizza bases (6 pieces)
- 1/2 cup tomato sauce
- 1 cup shredded mozzarella cheese
- 1/2 cup sliced pepperoni
- 1/4 cup sliced bell peppers
- 1/4 cup sliced olives
- 1 tsp dried oregano
Instructions
- Preheat oven to 375°F (190°C).
- Place mini pizza bases on a baking tray.
- Spread tomato sauce evenly on each base.
- Sprinkle mozzarella cheese over the sauce.
- Add pepperoni, bell peppers, and olives as toppings.
- Sprinkle dried oregano on top.
- Bake for 10-12 minutes until cheese melts and edges turn golden.
- Let cool for 2 minutes before serving.
Notes
- Use pre-made pizza bases for convenience.
- Feel free to swap toppings based on preference.
- For crispier crust, bake for an extra 2 minutes.
- Prep Time: 10 mins
- Cook Time: 12 mins
- Category: Appetizer
- Method: Baking
- Cuisine: Italian
Nutrition
- Serving Size: 1 mini pizza
- Calories: 180
- Sugar: 2g
- Sodium: 350mg
- Fat: 8g
- Saturated Fat: 3g
- Unsaturated Fat: 4g
- Trans Fat: 0g
- Carbohydrates: 20g
- Fiber: 1g
- Protein: 7g
- Cholesterol: 15mg