There’s something magical about old fashioned rice pudding – it’s like a warm hug in a bowl. My grandma used to make it on rainy afternoons, filling the whole house with the sweet scent of cinnamon and vanilla. That creamy, comforting texture takes me right back to her kitchen every single time.
What I love most about this recipe is how simple it is – just a handful of pantry staples transform into something truly special. The rice soaks up all that rich, milky goodness while it simmers, turning into the most dreamy dessert you can imagine. And the best part? You don’t need any fancy equipment, just a good sturdy pot and a wooden spoon (plus a little patience while it works its magic).
Why You’ll Love This Old Fashioned Rice Pudding
Oh, where do I even start? This rice pudding is pure comfort in every spoonful. Here’s why it’s been my go-to dessert for years:
- Creamy dreamy texture – That perfect balance between thick and silky comes from slow simmering. The rice plumps up just right while absorbing all that milky goodness.
- Pantry staples only – No fancy ingredients here! Just rice, milk, sugar and spices – things you probably have right now.
- One-pot wonder – Unlike fussy desserts, this cooks entirely on the stovetop in a single saucepan (less dishes – hooray!).
- Your way, every time – Love raisins? Toss ’em in! Prefer cardamom to cinnamon? Go wild! It’s endlessly adaptable to your taste.
Seriously, once you try this version, you’ll understand why it’s been passed down through generations. It’s simple food at its absolute best.
Ingredients for Old Fashioned Rice Pudding
Okay, let’s talk ingredients – and I mean exactly what you’ll need to make this dreamy pudding just right. Trust me, I’ve learned the hard way that small changes here make a big difference in that final creamy texture we’re after!
- 1 cup white rice (uncooked, rinsed) – I always use plain long-grain white rice – not instant! Giving it a good rinse removes excess starch so your pudding doesn’t get gummy.
- 4 cups whole milk (not skim!) – The fat in whole milk is non-negotiable for that rich, velvety texture. I tried 2% once and it just wasn’t the same – save the skim for cereal!
- 1/2 cup granulated sugar – This is my sweet spot (pun intended), but taste as you go – you might want a tablespoon more or less.
- 1/4 teaspoon salt – Just a pinch to balance the sweetness – don’t skip it!
- 1 teaspoon vanilla extract – The real stuff, please! That artificial vanilla just can’t compare.
- 1/2 teaspoon ground cinnamon + 1/4 teaspoon nutmeg – My favorite cozy spice combo. Freshly grated nutmeg if you’ve got it – it makes all the difference.
- 2 tablespoons butter – Stirred in at the end for that luxurious mouthfeel. Salted or unsalted both work fine here.
- 1/2 cup raisins (optional) – Grandma always soaked hers in warm water first to plump them up – game changer!
See? Nothing weird or hard to find – just honest ingredients that come together to create something truly magical. Now let’s get cooking!
How to Make Old Fashioned Rice Pudding
Alright, let’s get to the good part – turning those simple ingredients into creamy, dreamy rice pudding perfection. I’ll walk you through each step just like my grandma taught me, with all her little tricks for getting it just right. Don’t worry – it’s easier than you think!
Step 1: Rinse and Cook the Rice
First things first – grab your rice and give it a good rinse in cold water. I use a fine mesh strainer and rinse until the water runs clear (this takes about 30 seconds of swishing). That quick rinse makes all the difference – it removes the extra starch that can make pudding gluey instead of creamy.
Now grab your trusty 3-quart saucepan (the heavy-bottomed kind if you’ve got it – better for even heating). Toss in the rinsed rice, milk, sugar and that little pinch of salt. Turn the heat to medium and let it come to a gentle boil – I usually give it an initial stir just to dissolve the sugar. This is when that wonderful milky aroma starts filling your kitchen!
Step 2: Simmer for Creaminess
Once it boils, immediately lower the heat to the lowest setting your stove can handle. We want a lazy bubble here, not a rolling boil – high heat will scorch the milk and ruin our pudding dreams. Now comes the slightly meditative part – stirring.
Grab your wooden spoon (my favorite – it doesn’t scrape the pan) and plan to stir every 3-4 minutes. I usually set a timer to remind myself. The mixture will start thickening around the 15 minute mark as the rice drinks up all that milky goodness. Around 25-30 minutes total, you’ll know it’s ready when it coats the back of your spoon thickly and the rice is perfectly tender (not mushy!).

Step 3: Add Flavors and Finish
Now for the fun part – flavor town! Take the pot off the heat and stir in your vanilla, cinnamon, nutmeg, and that glorious butter. This is when I add raisins too if I’m using them (remember – plumped in warm water first!). Give everything a good stir – you’ll see the butter melt into that creamy goodness.
Let it sit for 5 minutes off heat – this lets the flavors marry and the pudding thicken up just a bit more. Then dive in warm (my personal favorite) or chill it if you prefer it cold. Either way, you’ve just made pure comfort in a bowl. Congrats, pudding master!
Expert Tips for Perfect Old Fashioned Rice Pudding
After making this recipe more times than I can count (and yes, burning a batch or two along the way), I’ve picked up some foolproof tricks for rice pudding perfection. These are the little things that take it from “pretty good” to “Grandma-worthy”:
- Choose your pan wisely – That heavy-bottomed saucepan isn’t just a suggestion! It prevents scorching better than thin pans. No heavy pan? Stir even more frequently and keep the heat extra low.
- Patience is key – Rushing with higher heat = burnt milk and undercooked rice. The slow simmer is what creates that signature creamy texture. Put on some music and enjoy the process!
- The cooling trick – Letting it sit 5-10 minutes after cooking does two magical things: thickens the pudding naturally and lets flavors deepen. Resist the urge to dig in immediately!
- Brown sugar swap – For a caramel-like depth, replace half the white sugar with packed brown sugar. The molasses notes pair beautifully with the cinnamon.
- Skin prevention – Hate that pudding skin? Press plastic wrap directly onto the surface before refrigerating. No weird film, just creamy goodness throughout.
One last pro tip from my grandma’s playbook: The pudding thickens as it cools, so if it seems a bit loose when hot, don’t panic! It’ll set up perfectly as it rests. Now go forth and make pudding magic!
Ingredient Substitutions
Listen, I know we all sometimes find ourselves staring into the pantry thinking “I don’t have that ingredient!” – been there! The good news is this old fashioned rice pudding is pretty forgiving. Here are my tried-and-true swaps that still deliver that creamy comfort we’re after:
- Milk alternatives – Need dairy-free? Unsweetened almond or coconut milk works, but the texture will be slightly thinner. For best results, use half milk alternative and half canned coconut milk for richness. (Fair warning – it’ll taste coconutty!)
- Sweetener swaps – Out of white sugar? Maple syrup or honey work beautifully – use 1/3 cup instead of 1/2 cup since they’re sweeter. The flavor changes slightly but in a delicious way! Just add it with the milk in step one.
- Rice varieties – In a pinch, jasmine or basmati rice substitute fine, but avoid short-grain or sushi rice (too sticky). Brown rice needs nearly double the cooking time and extra liquid – not ideal but doable if you’re patient!
- Butter options – No butter? A tablespoon of coconut oil adds similar richness for dairy-free versions. Margarine works in a pinch but honestly, I’d rather skip it than use the super-processed stuff.
- Spice alternatives – Not a cinnamon fan? Try cardamom for something floral, or pumpkin pie spice blend for autumn vibes. Sometimes I add a strip of orange zest while cooking for a bright note!
One substitution I don’t recommend? Instant rice – it turns to mush. And trust me, I learned the hard way that evaporated milk makes it weirdly gluey. Stick to these swaps and you’ll still end up with pudding worth savoring!
Serving and Storing Old Fashioned Rice Pudding
Now here’s the fun part – enjoying your homemade rice pudding just how you like it! I always taste a spoonful right from the pot (chef’s privilege!), but the magic happens when you let this pudding settle into its perfect form. Here’s how my family enjoys it every time:
Warm and cozy – My absolute favorite way! Let the pudding cool just enough so you don’t burn your tongue (about 5 minutes), then spoon it into bowls. The texture is luxuriously creamy when it’s warm, with all those cinnamon and vanilla aromas at their peak. I sometimes add an extra pat of butter on top that melts into golden pools – pure heaven.
Chilled and refreshing – For a cool treat, transfer the pudding to a bowl, press plastic wrap directly on the surface (to prevent that “skin” from forming), and refrigerate for at least 2 hours. The chilled version thickens beautifully and makes the perfect summer dessert – especially with fresh berries on top!
Storing Your Rice Pudding
Here’s the great news – this pudding keeps wonderfully in the fridge! Just make sure to:
- Cool it completely before storing (about 30 minutes at room temp)
- Use an airtight container or cover the bowl tightly with plastic wrap (remember – press it right onto the pudding’s surface)
- Keep it refrigerated for up to 3 days
Reheating Like a Pro
Leftover pudding? Lucky you! When reheating, add a splash of milk (about 1 tablespoon per serving) and warm gently on the stove over low heat, stirring often. The microwave works too – use 30 second bursts and stir between each one. The extra milk brings back that creamy consistency that might have thickened up in the fridge.
One last tip from my kitchen – the pudding actually tastes even better the next day as the flavors continue to meld. Sometimes I make it a day ahead just for this reason! Whether you enjoy it warm or cold, fresh or leftover, every spoonful is a little taste of comfort.
Old Fashioned Rice Pudding Nutrition
Let’s talk nutrition – because even comfort food deserves to be enjoyed without guilt! Now, I’m no dietitian, but I can tell you that this old fashioned rice pudding is made with real, wholesome ingredients that your body knows how to process. Here’s the scoop on what you’re getting in each comforting spoonful:
Per serving (about 1/2 cup):
- Calories: Around 250 – perfect for a satisfying dessert
- Fat: 8g (mostly from that good whole milk and butter)
- Carbs: 40g (hello, energy boost!)
- Protein: 6g – more than you’d expect from a dessert!
- Sugar: 20g (mostly natural from the milk and a bit of added sugar)
Now, full disclosure – these numbers can vary based on your exact ingredients (especially if you go wild with the raisins or use different milk). But here’s how I see it: This isn’t some processed dessert loaded with artificial junk. It’s simple, real food that nourishes your soul as much as your body.
For those watching specific dietary needs: This recipe is naturally vegetarian, and with the simple swaps I mentioned earlier, it can easily be made dairy-free too. The full nutritional breakdown (including sodium, fiber, etc.) is available if you’re curious – just ask in the comments!
At the end of the day, I believe in enjoying food that makes you feel good inside and out. And trust me – one bite of this creamy, cinnamon-spiced pudding, and you’ll know exactly what I mean.
FAQs About Old Fashioned Rice Pudding
After years of making this recipe (and fielding questions from friends and family), I’ve answered just about every rice pudding question under the sun! Here are the most common ones that come up – along with my hard-earned kitchen wisdom:
Can I use instant rice instead of regular white rice?
Oh honey, don’t do it! I made this mistake once and learned my lesson. Instant rice turns to complete mush – you’ll end up with gluey, unappetizing paste instead of that perfect tender-yet-distinct rice texture we’re after. Traditional long-grain white rice holds its shape beautifully during the slow simmer. Trust me, the extra 25 minutes is worth it!
How do I prevent that weird skin from forming on top?
Ah, the great pudding skin debate! Personally, I don’t mind a little skin (it’s where all the cinnamon flavor concentrates!), but if you’re anti-skin, here’s my foolproof method: As soon as you pour the pudding into your serving dish, press a piece of plastic wrap directly onto the surface – no air gaps! This creates a barrier that prevents skin formation. Remove it gently when ready to serve.
My pudding seems too thin – how can I thicken it?
First, don’t panic! Rice pudding thickens significantly as it cools. If it’s still too loose after cooling completely, try this trick: Mix 1 teaspoon cornstarch with 1 tablespoon cold milk, then stir it into the warm pudding and simmer for 2 more minutes. Or – my grandma’s method – let it chill overnight. The rice continues absorbing liquid, giving you that perfect spoon-standing texture by morning.
Can I make this in a slow cooker?
You absolutely can! Combine all ingredients (except vanilla and butter) in your slow cooker and cook on LOW for 3-4 hours, stirring occasionally. Add the vanilla and butter in the last 30 minutes. The texture comes out slightly different – more uniform – but still delicious. Just keep an eye on it toward the end; slow cookers vary in temperature.
Why does my rice pudding sometimes burn on the bottom?
Ugh, been there! The culprit is usually heat that’s too high or not stirring enough. Here’s what works for me: Use the heaviest-bottomed pot you own, keep the flame at the lowest possible simmer, and stir at least every 3-4 minutes (set a timer!). If you see any rice sticking, immediately reduce heat and scrape the bottom gently with a wooden spoon.
Got more questions? Drop them in the comments – I’m happy to share all my rice pudding wisdom! After all, we’re in this creamy, comforting journey together.
Share Your Feedback
I’d absolutely love to hear how your old fashioned rice pudding turns out! There’s something so special about knowing this recipe is being made in kitchens all over – just like my grandma’s was for our family. Did you add any fun twists? Maybe a splash of bourbon with those raisins or a dash of cardamom? Tell me everything in the comments below!
And hey – if you snap a photo of your creamy creation (especially if it’s in that adorable vintage bowl I know you’ve got), tag me on Instagram @[YourHandle]. There’s nothing that makes my day more than seeing your pudding masterpieces! Your reviews and variations help make this recipe even better for everyone.
Rating the recipe? Five spoons up if you’d make it again (that’s the official rice pudding rating system in my kitchen!). Seriously though, your feedback means the world – it’s what keeps these old family recipes alive and loved. Now go enjoy that pudding – you’ve earned it!
Print
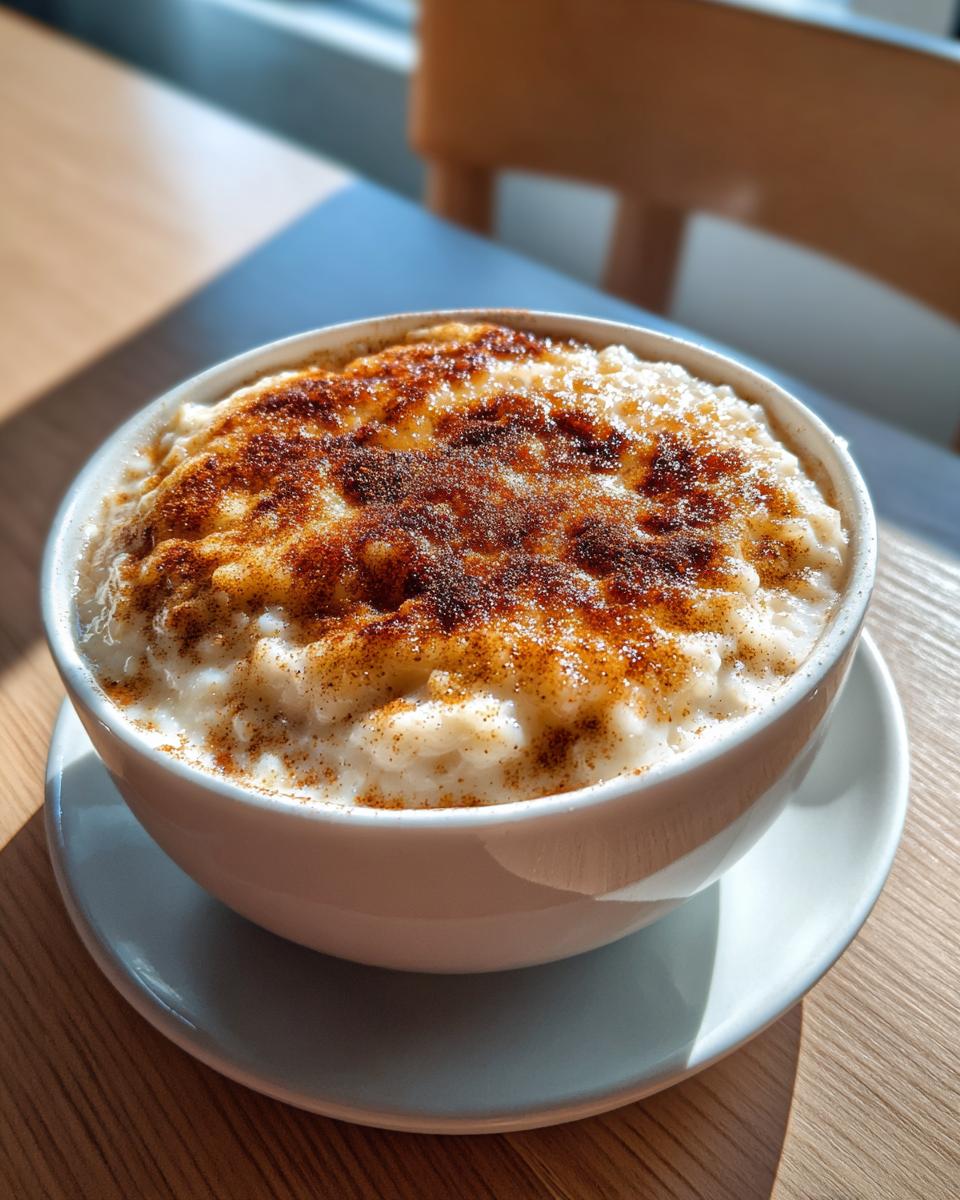
Creamy Old Fashioned Rice Pudding Recipe in Just 30 Minutes
- Total Time: 40 minutes
- Yield: 6 servings 1x
- Diet: Vegetarian
Description
A classic old-fashioned rice pudding made with simple ingredients for a creamy, comforting dessert.
Ingredients
- 1 cup white rice
- 4 cups whole milk
- 1/2 cup granulated sugar
- 1/4 teaspoon salt
- 1 teaspoon vanilla extract
- 1/2 teaspoon ground cinnamon
- 1/4 teaspoon ground nutmeg
- 2 tablespoons butter
- 1/2 cup raisins (optional)
Instructions
- Rinse the rice under cold water and drain.
- In a saucepan, combine rice, milk, sugar, and salt. Bring to a boil over medium heat.
- Reduce heat to low and simmer, stirring often, for 25-30 minutes until rice is tender and the mixture thickens.
- Stir in vanilla, cinnamon, nutmeg, butter, and raisins (if using).
- Cook for another 5 minutes, then remove from heat.
- Let cool slightly before serving warm or refrigerate for a chilled dessert.
Notes
- Stir frequently to prevent sticking.
- Adjust sugar to taste.
- For a richer texture, use half-and-half instead of milk.
- Prep Time: 5 minutes
- Cook Time: 35 minutes
- Category: Dessert
- Method: Stovetop
- Cuisine: American
Nutrition
- Serving Size: 1/2 cup
- Calories: 250
- Sugar: 20g
- Sodium: 150mg
- Fat: 8g
- Saturated Fat: 5g
- Unsaturated Fat: 2g
- Trans Fat: 0g
- Carbohydrates: 40g
- Fiber: 1g
- Protein: 6g
- Cholesterol: 25mg