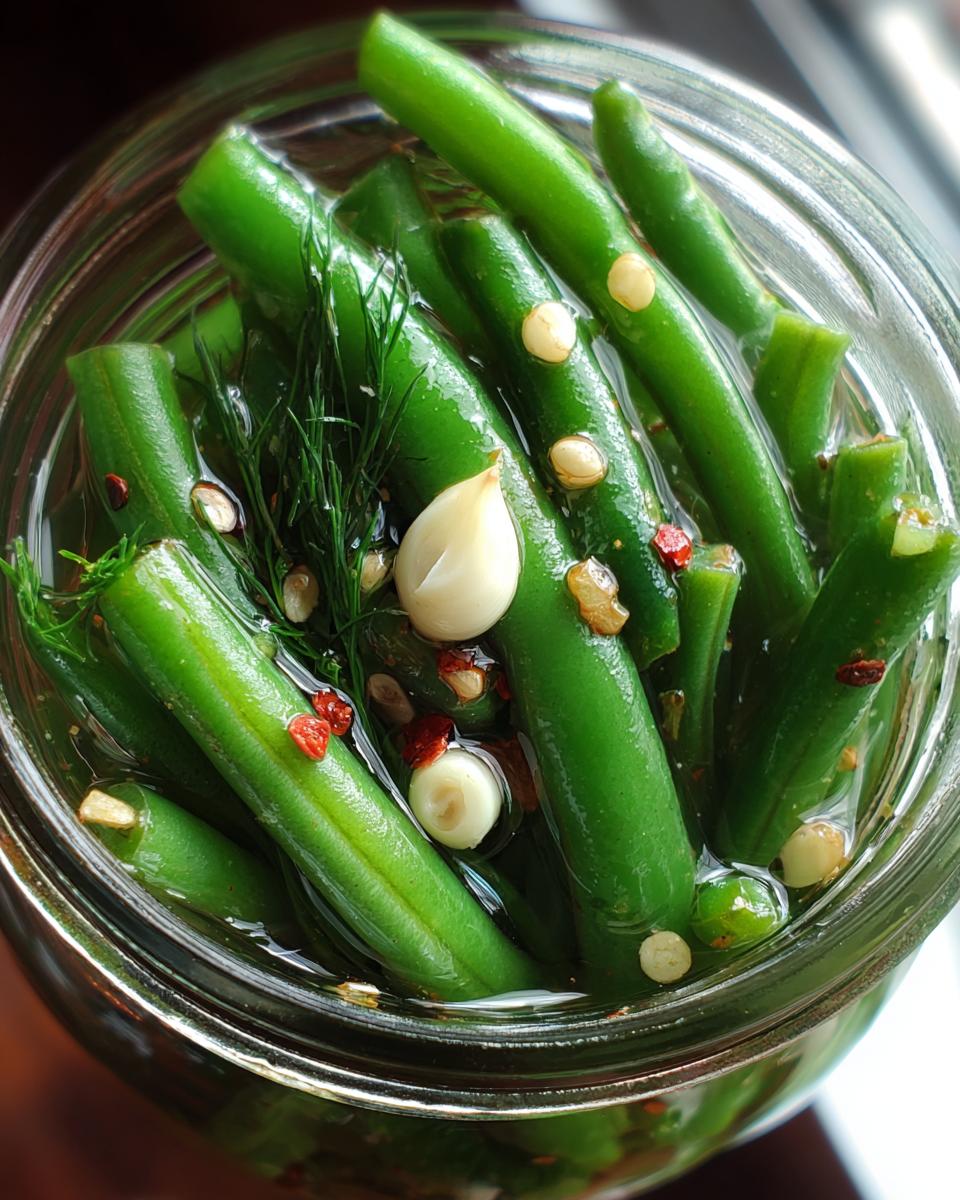
Oh my gosh, have you ever tasted pickled green beans? Those crunchy, tangy little sticks of joy we call dilly beans? I still remember my first bite – that glorious combination of crisp texture and vinegary punch that made me an instant addict. My grandma used to can jars and jars of them every summer, and we’d sneak into the pantry like little bandits to swipe them straight from the jar.
Now I make my own batches of pickled green beans using her secret method (okay, not so secret – I’m sharing it with you!). There’s something magical about how simple ingredients transform into these addictive snacks. Fresh beans get a soak in garlicky, dilly brine, emerging two weeks later as the most crave-worthy pickle you’ll ever taste. Perfect for snacking, salads, or just standing at the fridge eating them cold from the jar (no judgment here!).
Why You’ll Love These Pickled Green Beans (Dilly Beans)
Listen, these aren’t just any pickles – they’re crunchy little flavor bombs that’ll ruin store-bought pickles for you forever. Here’s why my dilly beans recipe is absolutely worth the (minimal) effort:
- That addictive crunch – Fresh green beans stay satisfyingly crisp even after pickling (none of that mushy nonsense!)
- Easy-peasy process – If you can boil water, you can make these. Seriously, it’s mostly waiting time!
- Spice it your way – Love heat? Extra pepper flakes. Prefer mild? Skip ’em. Make it YOUR perfect pickle.
- Snack-worthy versatility – Eat them straight from the jar, chop into salads, or serve with cocktails (they’re amazing with bloody marys!)
Trust me, once you try homemade, you’ll never look at grocery store pickles the same way again.
Ingredients for Pickled Green Beans (Dilly Beans)
Here’s everything you’ll need to make the crispiest, tangiest dilly beans around. I’m super picky about ingredients because – let’s be honest – great pickles start with great stuff:
- 1 pound fresh green beans – Look for firm, bright ones (limp beans make sad pickles)
- 2 cups white vinegar – The 5% acidity kind, please – this keeps things safely pickled
- 2 cups water – Filtered if your tap water tastes funky
- 2 tablespoons pickling salt – Regular table salt can make the brine cloudy
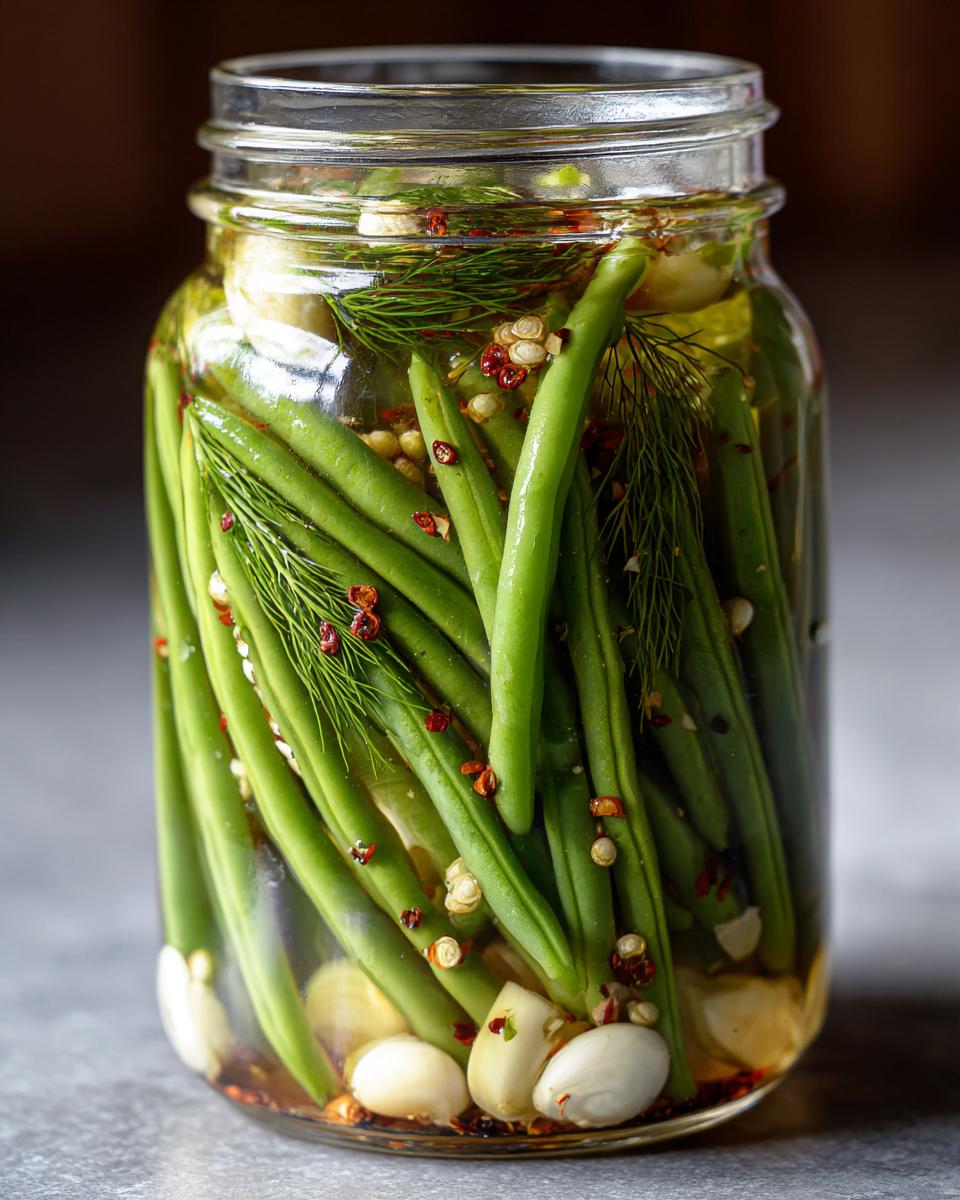
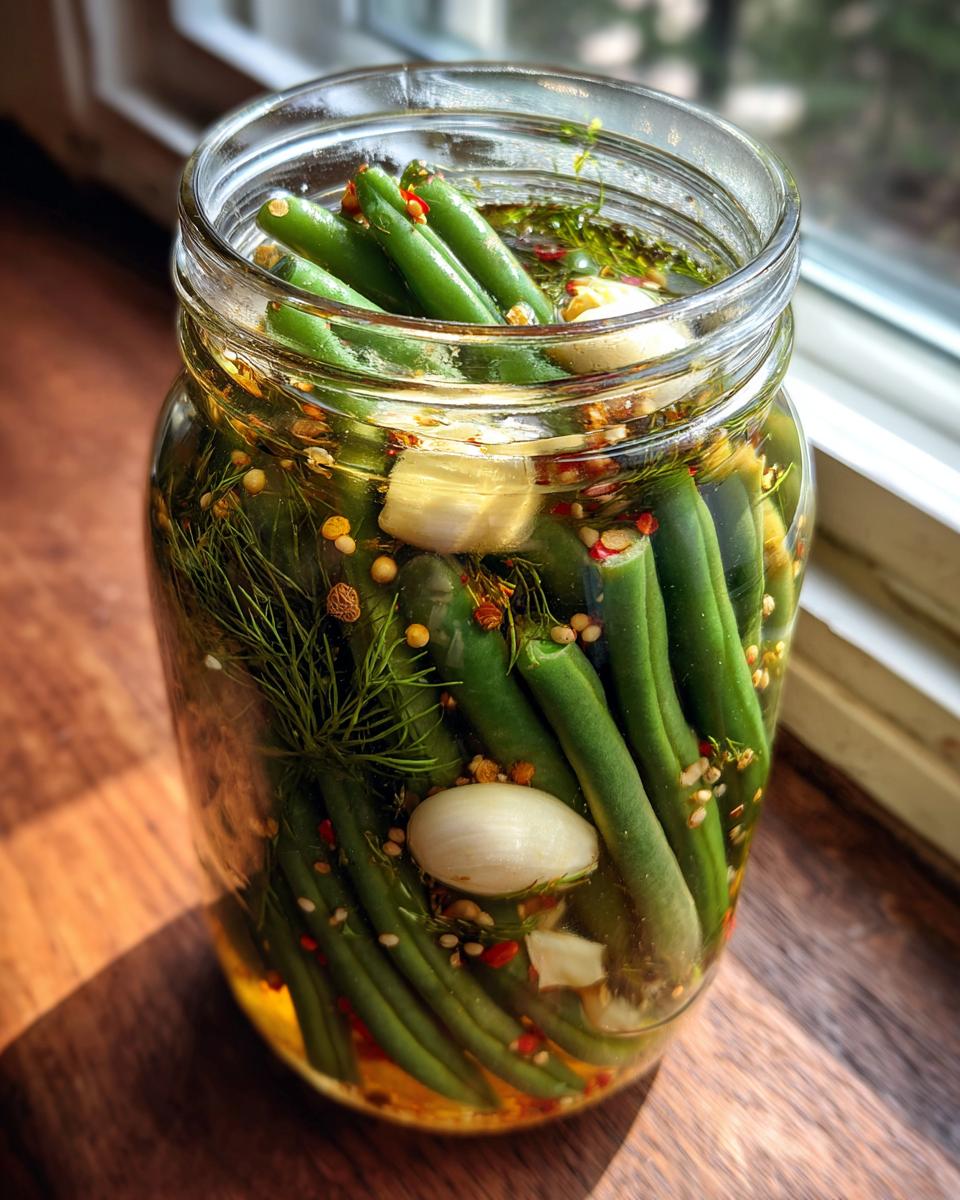
- 4 cloves garlic – Peeled and slightly crushed (they’ll infuse better this way)
- 2 teaspoons dill seeds – Not dill weed! Seeds give that classic dilly bean flavor
- 1 teaspoon red pepper flakes – Adjust up or down depending on your heat tolerance
See? Nothing fancy – just good, honest ingredients that work magic together!
Equipment You’ll Need
Don’t worry – you don’t need fancy gadgets to make amazing dilly beans! Here’s what I always grab from my kitchen:
- Clean pint jars with lids – I reuse pasta sauce jars in a pinch!
- Large pot – For boiling water and processing jars
- Ladle and funnel – Essential for hot brine without burns or spills
- Chopstick or butter knife – To poke out air bubbles after filling jars
Nice-to-haves: jar lifter (saves fingers!), magnetic lid lifter, and a timer so you don’t forget your processing time!
How to Make Pickled Green Beans (Dilly Beans)
Okay, let’s get down to business! Making dilly beans is easier than you think – just follow these simple steps and you’ll have jars of crunchy goodness ready in no time. The hardest part? Waiting those two weeks for the flavors to develop!
Preparing the Green Beans
First things first – wash those beans! Give them a good rinse under cold water and trim off the stem ends. Now here’s my trick: measure your beans against your jars before cutting. You want them to stand upright with about 1/2 inch of space at the top. Pack them in tight – I mean really jam them in there – but don’t break them! They’ll shrink a bit during processing.
Making the Brine
While your jars are sterilizing (just boil them for 10 minutes), make the brine. Combine the vinegar, water, and salt in a saucepan and bring to a rolling boil. Stir until all the salt dissolves completely – no grainy bits left! This ensures even flavor distribution. Keep it boiling while you pack your jars.
Packing and Processing Jars
Divide the garlic, dill seeds, and pepper flakes between your jars. Carefully pack in the beans standing upright. Pour the hot brine over them, leaving that 1/2 inch headspace. Run a chopstick around the inside to release any air bubbles. Wipe the rims with a clean cloth – this helps create a good seal. Screw on the lids fingertip-tight and process in a boiling water bath for 10 minutes. Listen for that satisfying “ping” as they cool!
Tips for Perfect Pickled Green Beans (Dilly Beans)
After making hundreds of jars (okay, maybe dozens), I’ve learned all the tricks for foolproof dilly beans:
- Pick fresh or skip it – Beans should snap cleanly when bent. Limp ones won’t give you that signature crunch.
- Taste your brine – Before pouring, dip a spoon in to check saltiness. Too strong? Add water. Too weak? More salt.
- Wait it out – I know it’s tempting, but resist opening jars before 2 weeks! That’s when the magic really happens.
- Label everything – Trust me, you’ll forget which jars are “mild” and which are “fire-breathing dragon” hot.
My biggest tip? Make extra – these disappear faster than you’d think!
Variations for Pickled Green Beans (Dilly Beans)
Once you’ve mastered the basic recipe, it’s time to play! Here are my favorite ways to mix things up:
- Vinegar swap – Try apple cider vinegar for a slightly fruity twist (just keep it 5% acidity)
- Extra crunch – Add 1/2 teaspoon mustard seeds or coriander seeds for pops of texture
- Garlic lovers – Double the garlic (or add some sliced shallots!) for serious punch
- Sweet heat – Stir 1 tablespoon honey into the brine before boiling
The best part? You can make each jar different – label them and have a pickle tasting party!
Storing and Serving Pickled Green Beans (Dilly Beans)
Here’s the beautiful thing about these pickled green beans – they practically take care of themselves! Properly processed jars will keep for up to a year in your pantry (if they last that long). Once opened, just pop them in the fridge where they’ll stay crisp for months.
Now for the fun part – eating them! We love them straight from the jar as a snack, but they’re also amazing chopped into potato salad, tossed with roasted vegetables, or even as a cocktail garnish. My personal favorite? A big platter with sharp cheeses, crusty bread, and a jar of these tangy beans – instant appetizer heaven!
Frequently Asked Questions
I get questions about these pickled green beans all the time – here are the answers to the ones that pop up most often in my kitchen:
- “Can I reuse the brine?” Nope! Once it’s been used for canning, the acidity isn’t reliable for safety. But I sometimes use leftover unprocessed brine for quick fridge pickles with veggies like onions or carrots.
- “How long until they’re ready to eat?” I know it’s torture, but wait at least 2 weeks! The flavors need time to mingle and develop. They get even better after a month.
- “Why are my beans floating?” Totally normal! The air pockets in the beans make them buoyant. Just flip the jar upside down occasionally to redistribute the flavors.
- “Can I skip the water bath?” Only if you’re planning to refrigerate and eat them within a month. For shelf-stable jars that last a year, processing is a must!
Got more pickle questions? Just ask – I could talk dilly beans all day!
Nutritional Information
Just a quick note – these nutritional estimates can vary based on your specific ingredients and how many beans you pack into each jar! But here’s the general breakdown for my pickled green beans:
- Serving size: About 1/4 cup (4-5 beans)
- Calories: Around 15 per serving
- Sodium: Approximately 590mg (from the brine)
- Carbs: 3g mostly from the beans
Honestly though – when something tastes this good, who’s counting? Now go make a batch and tell me how yours turn out!
Print
Crispy 2-Week Pickled Green Beans – Irresistibly Tangy!
- Total Time: 25 minutes
- Yield: 2 pints 1x
- Diet: Vegan
Description
A simple recipe for pickled green beans, also known as dilly beans. These tangy, crunchy beans are perfect for snacking or adding to salads.
Ingredients
- 1 pound green beans, trimmed
- 2 cups white vinegar
- 2 cups water
- 2 tablespoons pickling salt
- 4 cloves garlic, peeled
- 2 teaspoons dill seeds
- 1 teaspoon red pepper flakes
Instructions
- Wash and trim the green beans to fit your jars.
- Combine vinegar, water, and salt in a pot. Bring to a boil.
- Pack beans into sterilized jars. Add garlic, dill seeds, and red pepper flakes.
- Pour hot brine over the beans, leaving 1/2 inch headspace.
- Seal jars and process in a boiling water bath for 10 minutes.
- Let cool and store for at least 2 weeks before eating.
Notes
- Use fresh, firm green beans for best results.
- Adjust spice levels to your taste.
- Wait at least 2 weeks for flavors to develop.
- Prep Time: 15 minutes
- Cook Time: 10 minutes
- Category: Pickles
- Method: Canning
- Cuisine: American
Nutrition
- Serving Size: 1/4 cup
- Calories: 15
- Sugar: 1g
- Sodium: 590mg
- Fat: 0g
- Saturated Fat: 0g
- Unsaturated Fat: 0g
- Trans Fat: 0g
- Carbohydrates: 3g
- Fiber: 1g
- Protein: 1g
- Cholesterol: 0mg