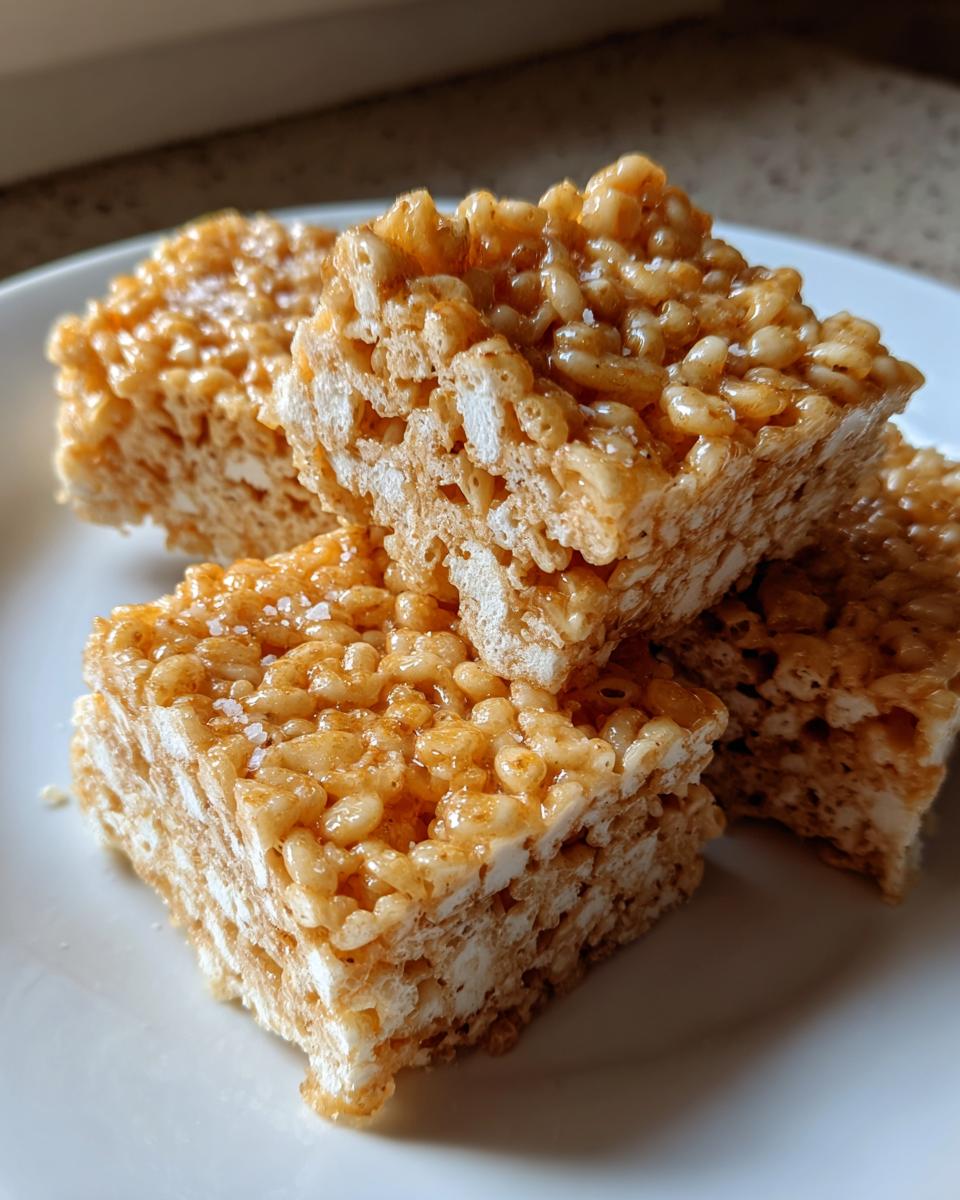
You know those childhood memories that just stick with you? For me, it’s pulling a gooey, sticky Rice Krispie Treat straight from the pan—fingers covered in marshmallow, that unmistakable crunch under my teeth. But let me tell you, my Salted Brown Butter Rice Krispie Treats? They’re the grown-up, way more delicious version of that nostalgia. I stumbled onto this twist one rainy Sunday when I had a hankering for something sweet but wanted to elevate my usual snack game. Browning the butter adds this deep, nutty richness, and that pinch of sea salt? Oh, it’s the magic touch that makes these impossible to resist.
Why You’ll Love These Salted Brown Butter Rice Krispie Treats
Listen, I know you’ve had Rice Krispie Treats before, but trust me—these are different. Here’s why they’ll become your new go-to:
- Easy as can be: We’re talking 20 minutes from start to finish, folks. Perfect for when that sweet tooth hits hard and you need instant gratification.
- That brown butter magic: Takes the flavor from “nice” to “oh wow!” with its deep, nutty richness. It’s the difference between vanilla ice cream and vanilla bean.
- Sweet-salty perfection: That little sprinkle of sea salt? It’s like the universe finally got the balance right—just enough to make the sweet pop without tasting salty.
- Nostalgia, upgraded: All the childhood joy you remember, but with a sophisticated twist that’ll impress even your foodie friends.
Seriously, once you try these, the regular version just won’t cut it anymore.
Ingredients for Salted Brown Butter Rice Krispie Treats
Okay, let’s gather our simple but mighty ingredients—these are the building blocks of magic right here:
- 6 cups Rice Krispies cereal (the classic crunch—don’t skimp!)
- 1/4 cup unsalted butter (trust me, unsalted lets you control that perfect salty-sweet balance)
- 10 oz marshmallows (fresh ones melt smoother—no stale bags lurking in your pantry!)
- 1/2 tsp sea salt (flaky Maldon salt is my secret weapon)
Quick prep note: Grab some butter or cooking spray for your pan—you’ll thank me later when these babies pop right out. That’s it! Four ingredients, zero fuss, maximum deliciousness.
Equipment You’ll Need
Don’t worry—you won’t need any fancy gadgets for these treats! Just grab:
- A large saucepan (big enough to stir everything without making a mess)
- Wooden spoon (my trusty sidekick—it won’t melt like plastic!)
- 9×13-inch pan (the classic size for perfect thickness)
- Spatula (for pressing that sticky goodness evenly)
That’s seriously it! Now let’s get cooking—or should I say, melting and mixing?
How to Make Salted Brown Butter Rice Krispie Treats
Okay, let’s get down to business—here’s exactly how I make these addictive treats every single time. Follow these steps, and you’ll be snacking in no time!
- Brown that butter: Melt your butter in a large saucepan over medium heat. Here’s where the magic starts—keep stirring until it turns golden brown and smells nutty (about 3-5 minutes). Don’t walk away! Burnt butter is sad butter.
- Marshmallow meltdown: Dump in all those marshmallows and stir constantly until they’re completely smooth and melted. This takes about 2-3 minutes—be patient and keep that wooden spoon moving!
- Krispie party: Take the pan off the heat and immediately stir in the Rice Krispies and sea salt. Work quickly to coat every last crunchy piece.
- Press with purpose: Transfer the mixture to your greased pan. Here’s my trick—lightly grease your hands too, then press evenly (but don’t smash too hard—we want some airy texture!).
- The hardest part: Walk away! Let them cool completely (about 30 minutes) before cutting into squares. I know, the waiting is torture.

Tips for Perfect Salted Brown Butter Rice Krispie Treats
Here’s what I’ve learned after many (many) batches:
- Grease your hands—it’s the only way to press the mixture without losing half of it stuck to your fingers!
- Fresh marshmallows melt smoother than older ones that have dried out.
- Taste the butter as it browns—when it smells like toasted nuts, you’re golden (literally).
- Want more salt? Sprinkle a tiny bit on top right after pressing for extra flavor sparkle.
Variations on Salted Brown Butter Rice Krispie Treats
Once you’ve mastered the basic recipe (and eaten half the pan), it’s time to play around! Here are my favorite ways to mix things up:
- Chocolate drizzle: Melt some dark chocolate and zigzag it over the top—because chocolate makes everything better.
- Flaky salt upgrade: Swap regular sea salt for Maldon flakes sprinkled on top right after pressing—that crunch!
- Nutty twist: Stir in chopped toasted pecans or almonds with the cereal for extra texture.
- Caramel swirl: Dollop salted caramel sauce over the pressed treats before cooling—sheer decadence.
The beauty? You can’t mess these up—every variation is delicious!
Serving and Storing Salted Brown Butter Rice Krispie Treats
Here’s the best part—devouring your creations! I like cutting mine into generous 2-inch squares (though no judgment if you go bigger). A pizza cutter works wonders for clean slices. These keep beautifully in an airtight container at room temperature for up to 3 days—if they last that long! If they firm up too much, a quick 5-second microwave zap brings back that fresh-off-the-pan gooeyness. Pro tip: Layer them between parchment paper so they don’t stick together. Now go share—or don’t, I won’t tell!
Nutritional Information
Just so you know what you’re biting into (not that it’ll stop you—I never let numbers come between me and dessert!): Each irresistible bar clocks in at about 150 calories, with 12g sugar and 5g fat. These are estimates, of course—your actual bites may vary depending on how generous you are with those squares!
Frequently Asked Questions
Can I use salted butter instead of unsalted?
You can, but reduce the added sea salt by half—salted butter varies in saltiness, and we don’t want to overdo it. I prefer unsalted so I can control that perfect salty-sweet balance myself.
How long do these treats stay fresh?
They keep beautifully for 3 days in an airtight container at room temperature. If they stiffen up, a quick 5-second microwave zap brings back the gooey magic!
Can I freeze Salted Brown Butter Rice Krispie Treats?
Absolutely! Freeze them in a single layer first, then stack with parchment between layers. Thaw at room temperature for about 30 minutes when cravings strike.
Why brown the butter?
It adds a nutty, caramelized depth that regular melted butter just can’t match. That extra 3 minutes of stirring? Totally worth it for the flavor upgrade. For more on the science of browning butter, check out this guide to browning butter.
Can I use mini marshmallows?
Of course! They melt faster than regular ones—just keep stirring until completely smooth before adding the cereal.
Final Thoughts
I hope you love these Salted Brown Butter Rice Krispie Treats as much as I do—they’re my happy-making, nostalgia-packed, can’t-eat-just-one treat. Give them a whirl this weekend and let me know how they turn out! Snap a pic, tag me, or just enjoy every last sticky bite. Happy baking, friends!
15-Minute Salted Brown Butter Rice Krispie Treats: Irresistible!
- Total Time: 20 mins
- Yield: 12 bars 1x
- Diet: Vegetarian
Description
A twist on the classic Rice Krispie Treats with rich brown butter and a touch of salt for a sweet and savory flavor.
Ingredients
- 6 cups Rice Krispies cereal
- 1/4 cup unsalted butter
- 10 oz marshmallows
- 1/2 tsp sea salt
Instructions
- Melt butter in a large pan over medium heat until it turns golden brown.
- Add marshmallows and stir until fully melted.
- Remove from heat and stir in Rice Krispies and sea salt.
- Press mixture into a greased 9×13-inch pan.
- Let cool before cutting into squares.
Notes
- Use a wooden spoon for stirring to avoid sticking.
- Grease hands slightly when pressing the mixture into the pan.
- Store in an airtight container for up to 3 days.
- Prep Time: 10 mins
- Cook Time: 10 mins
- Category: Dessert
- Method: Stovetop
- Cuisine: American
Nutrition
- Serving Size: 1 bar
- Calories: 150
- Sugar: 12g
- Sodium: 120mg
- Fat: 5g
- Saturated Fat: 3g
- Unsaturated Fat: 2g
- Trans Fat: 0g
- Carbohydrates: 25g
- Fiber: 0g
- Protein: 1g
- Cholesterol: 10mg