Okay, let me tell you about my absolute favorite Halloween tradition – baking these showstopping spiderweb brownies! I still remember the first time I made them for my niece’s costume party – the second they came out of the oven, everyone went crazy for that creepy-cool web design. The best part? They’re secretly SO easy to make. Just whip up a batch of rich chocolate brownies (my go-to recipe never fails), then get creative with a simple cream cheese web. Trust me, these spiderweb brownies disappear faster than ghosts at sunrise! They’re the perfect mix of spooky and delicious – fudgy chocolate base with a web design that looks way fancier than it actually is. Every year now, my kitchen turns into a brownie decorating station, with kids and adults alike fighting over who gets to pipe the webs (and who gets to lick the bowl after).
Why You’ll Love These Spiderweb Brownies
Let me count the ways these brownies will become your new Halloween staple:
- Seriously easy – The web looks fancy but takes just minutes to pipe!
- Halloween magic – That creepy-crawly design steals the show at any spooky party.
- Chocolate lovers dream – Rich, fudgy brownie base that melts in your mouth.
- Kid-approved fun – Decorating these is half the excitement (perfect for little helpers).
- Versatile treat – Dress them up with edible glitter or keep it classic.
I promise, one bite of these spiderweb brownies and you’ll be hooked. They’re the kind of dessert that disappears fast but leaves everyone begging for the recipe!
Ingredients for Spiderweb Brownies
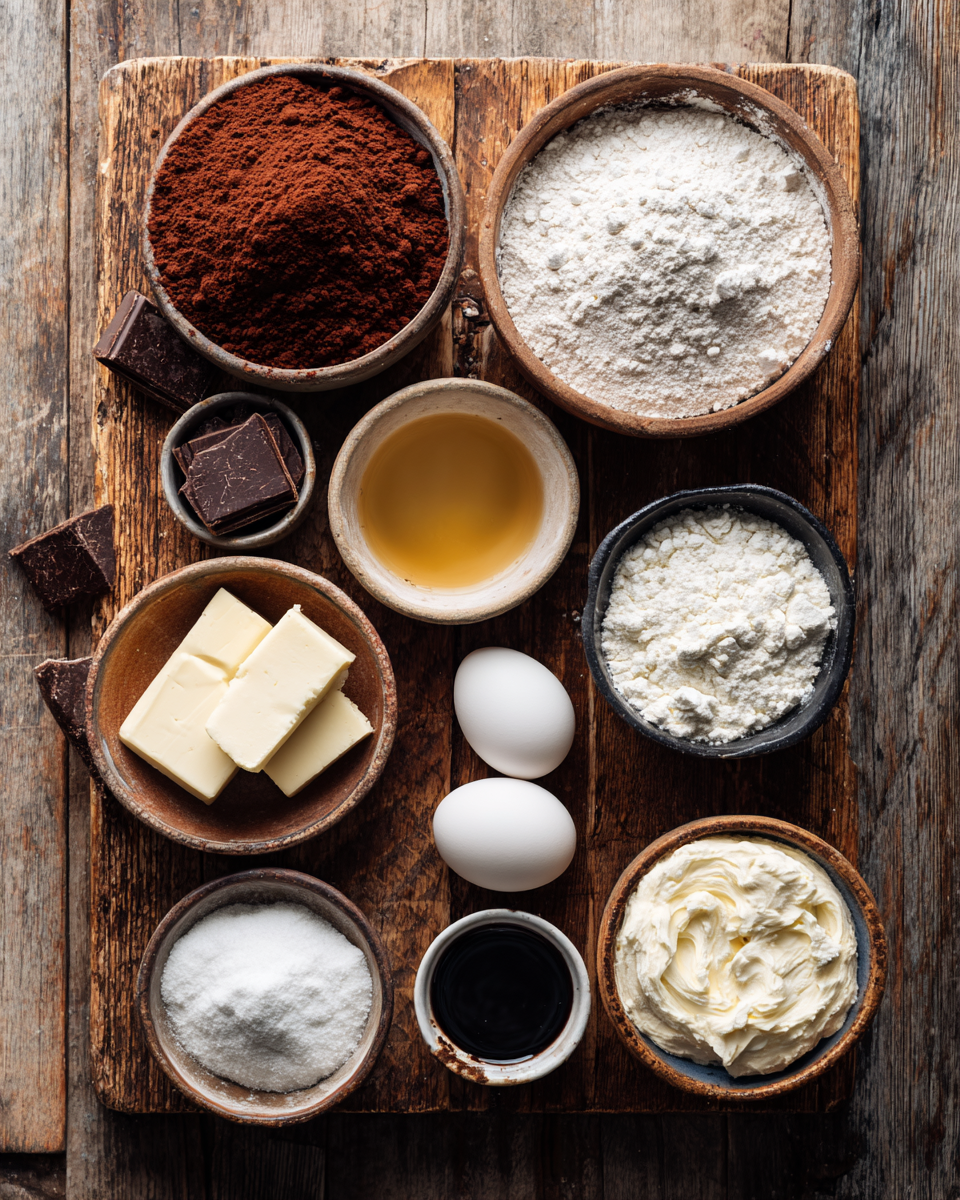
Here’s everything you’ll need for these spooktacular treats – I like to lay all my ingredients out before starting so I don’t forget anything in the Halloween baking frenzy!
- 1 cup all-purpose flour (spooned and leveled – this matters!)
- 1/2 cup unsweetened cocoa powder (the good stuff makes all the difference)
- 1/2 teaspoon salt (I use fine sea salt)
- 1/2 cup unsalted butter, melted and cooled (trust me, let it cool a bit)
- 1 cup granulated sugar
- 2 large eggs, room temperature (take them out 30 mins early)
- 1 teaspoon pure vanilla extract
- 1/4 cup cream cheese, softened (full-fat works best for piping)
- 1 tablespoon powdered sugar
- 1/4 teaspoon black food coloring (or more for darker webs)
Ingredient Notes & Substitutions
Baking is science, but we can tweak it! For butter, coconut oil works in a pinch (though the flavor changes slightly). Need gluten-free? Swap in your favorite 1:1 GF flour blend. Cocoa powder? I prefer natural but Dutch-process works too – just don’t use hot chocolate mix! For the web, gel food coloring gives richer black than liquid (start with a toothpick dip). No piping bag? A ziplock with the corner snipped works wonders in a Halloween emergency!

Equipment You’ll Need
Gathering your tools is half the fun – here’s what you’ll need to make these spooky treats come to life:
- 8×8-inch baking pan (my trusty square pan never lets me down)
- 2 mixing bowls (one for dry, one for wet ingredients)
- Whisk (don’t skip this – clumpy cocoa is no one’s friend)
- Spatula (for scraping every last bit of that delicious batter)
- Piping bag or ziplock bag (for those perfect web lines)
That’s it! No fancy equipment needed – just the basics that you probably already have in your kitchen.
How to Make Spiderweb Brownies
Alright, let’s get these spooky treats going! First things first – preheat that oven to 350°F (175°C). Trust me, you don’t want to have perfect batter ready only to realize your oven’s still cold. Been there, done that!
Preparing the Brownie Batter
Start by whisking together your dry ingredients – flour, cocoa powder, and salt – in one bowl. Get out any cocoa lumps now or they’ll haunt your batter later! In another bowl, mix the melted (but not hot!) butter with sugar until it looks like wet sand. Crack in the eggs one at a time, mixing well after each, then stir in the vanilla. Now, gently fold the dry ingredients into the wet – just until combined! Overmixing makes tough brownies, and we want these fudgy and delicious.
Creating the Spiderweb Design
Here’s where the magic happens! Pour your brownie batter into the prepared pan and smooth the top. Now for the fun part – mix your softened cream cheese with powdered sugar and black food coloring until it’s smooth as a spider’s silk. Spoon it into a piping bag (or that trusty ziplock with the corner snipped off). Pipe 3-4 concentric circles on your batter, then take a toothpick or knife and gently drag lines from the center out to the edges to create the web. Pro tip: Wipe your knife between drags for cleaner lines! If you mess up, just smooth it over and try again – the batter’s very forgiving.

Baking and Cooling
Pop those beauties in the oven for 20-25 minutes. You’ll know they’re done when the edges pull away slightly and a toothpick comes out with just a few moist crumbs (not wet batter). Now comes the hardest part – WAITING! Let them cool completely in the pan before slicing, or your web design will smear into a spooky blob. I know it’s tempting, but patience pays off with perfect spiderweb brownies!
Tips for Perfect Spiderweb Brownies
After making these spiderweb brownies more times than I can count, here are my foolproof tips for absolute perfection:
- Sift that cocoa powder – Takes 10 seconds but makes your batter silky smooth instead of lumpy.
- Chill your cream cheese – Just 15 minutes in the fridge helps it pipe cleaner lines for that picture-perfect web.
- Gel food coloring is key – Liquid makes the web gray and runny, but gel gives that deep, eerie black.
- Room temp eggs matter – They incorporate better for that fudgy texture we all crave.
- Don’t skip the cooling time – I know it’s hard, but cutting too soon smears your masterpiece!
Follow these simple tricks and your spiderweb brownies will be the talk of every Halloween party!
Serving and Storage
These spiderweb brownies are showstoppers on their own, but I love taking them over the top with a scoop of vanilla ice cream melting into the warm chocolate – pure Halloween magic! For storage, keep them in an airtight container at room temperature for up to 3 days (if they last that long!). Want to make ahead? They freeze beautifully – just wrap tightly in plastic wrap first. Pro tip: Thaw frozen brownies at room temperature for about an hour before serving to keep that web design crisp!
Nutritional Information
Now, let’s be real – we’re not eating spiderweb brownies for their health benefits! But since you asked, here’s the scoop: each fudgy square packs all the deliciousness you’d expect from a proper chocolate treat. Keep in mind these numbers are estimates – your exact results might vary depending on specific ingredients and how generously you slice them (no judgment here!).
One important note: These values don’t include any extras like ice cream or whipped cream (though I highly recommend both for maximum enjoyment!). At the end of the day, these are meant to be a fun, occasional indulgence – perfect for when you want to impress at Halloween or satisfy that chocolate craving with something extra special.
FAQ About Spiderweb Brownies
Over years of making these, I’ve gotten all sorts of questions – here are the ones I hear most often with my tried-and-true answers:
Can I make these without food coloring?
Absolutely! Skip the black dye for a “ghost web” look, or mix cocoa powder into the cream cheese for a chocolate web instead.
How do I fix runny cream cheese?
Pop it in the fridge for 10-15 minutes to firm up. Too thick? Add milk a teaspoon at a time until pipeable.
Can I double the recipe?
Yes! Use a 9×13-inch pan and add 5-10 minutes to baking time. The web might need extra piping bags for all that batter.
Can kids help decorate?
Of course! Let them pipe the circles, then you do the knife pulls. Messy webs taste just as delicious.
Why are my lines bleeding?
Your batter might have been too warm when piping – let it sit 5 minutes before adding the web next time.
Share Your Creations
I’d love to see your spooky masterpieces! Tag me @SpiderwebBrownieQueen on Instagram with your creations – nothing makes me happier than seeing your kitchen turn into a Halloween bakery too!
Print
Spiderweb Brownies: 5 Simple Steps for Spooky Halloween Magic
Decadent chocolate brownies with a spiderweb design perfect for Halloween or any spooky occasion.
- Total Time: 40 minutes
- Yield: 9 brownies 1x
Ingredients
- 1 cup all-purpose flour
- 1/2 cup cocoa powder
- 1/2 teaspoon salt
- 1/2 cup unsalted butter, melted
- 1 cup granulated sugar
- 2 large eggs
- 1 teaspoon vanilla extract
- 1/4 cup cream cheese, softened
- 1 tablespoon powdered sugar
- 1/4 teaspoon black food coloring
Instructions
- Preheat oven to 350°F (175°C). Grease an 8×8-inch baking pan.
- In a bowl, whisk flour, cocoa powder, and salt together.
- In another bowl, mix melted butter and sugar. Add eggs and vanilla, stirring until smooth.
- Combine wet and dry ingredients, mixing until just incorporated.
- Pour batter into prepared pan.
- In a small bowl, mix cream cheese, powdered sugar, and black food coloring.
- Transfer cream cheese mixture to a piping bag and pipe spiderweb designs on top of the brownie batter.
- Bake for 20-25 minutes or until a toothpick comes out clean.
- Let cool before slicing.
Notes
- For a darker web, add more black food coloring.
- Store in an airtight container for up to 3 days.
- Serve with whipped cream for extra indulgence.
- Prep Time: 15 minutes
- Cook Time: 25 minutes
- Category: Dessert
- Method: Baking
- Cuisine: American
- Diet: Vegetarian
Nutrition
- Serving Size: 1 brownie
- Calories: 220
- Sugar: 18g
- Sodium: 120mg
- Fat: 10g
- Saturated Fat: 6g
- Unsaturated Fat: 3g
- Trans Fat: 0g
- Carbohydrates: 30g
- Fiber: 2g
- Protein: 3g
- Cholesterol: 55mg


