You know that feeling when the first real warm day of the year hits, and you just want to eat something that tastes exactly like sunshine? That’s what this Spring Green Risotto is for me. It’s my absolute favorite way to celebrate the season’s first harvest—turning simple, bright vegetables into a bowl of pure comfort that’s somehow both rich and light at the same time.
I’ve been making versions of this risotto for what feels like forever, tweaking it at countless family lunches and last-minute dinners with friends. The creamy texture, that little bit of bite from the rice, and the pop of fresh peas… it’s magic. I remember one Easter, I was scrambling for a main dish and threw this together with whatever I had from the farmer’s market. It was the hit of the table! Everyone kept asking for the recipe, and that’s when I knew this one was a keeper. After years of stirring (and yes, a few learning experiences along the way), I’ve nailed down the simple secrets to getting it perfect every single time.
Why You Will Love This Spring Green Risotto
Oh, this isn’t just another rice dish, I promise. This Spring Green Risotto is the kind of meal that makes you feel like a kitchen wizard with minimal effort. Here’s exactly why it’s become my go-to spring celebration:
- It’s the ultimate comfort food with a bright twist. You get that incredibly creamy, luxurious texture that makes risotto so special, but the flavor is fresh and lively from all those gorgeous green veggies.
- It’s a love letter to the season. Cooking with asparagus, peas, and spinach that are at their peak is a joy. You’re literally tasting spring in every single bite.
- The process is simple and kinda therapeutic. Don’t let anyone scare you off! Yes, you need to stir, but it’s a straightforward rhythm of adding broth and watching the magic happen. It’s my favorite 30 minutes of quiet kitchen focus.
- It’s incredibly versatile. Having friends over? It feels fancy. Need a quick weeknight dinner? It comes together fast. It’s a cozy bowl of happiness that works for just about any occasion.
Ingredients for Your Spring Green Risotto
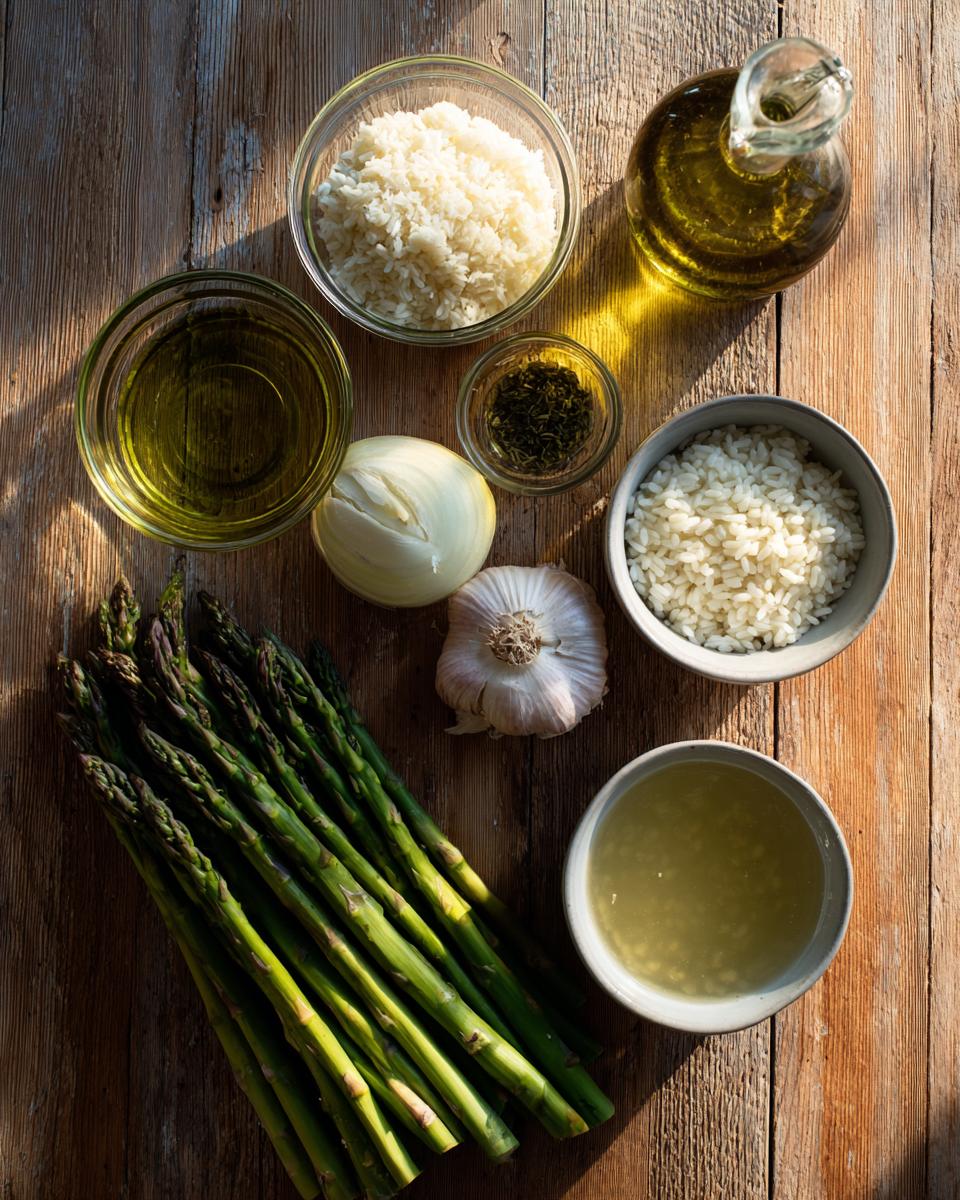
Okay, let’s get everything ready! This is my favorite part—lining up all those fresh, beautiful ingredients. It feels like you’re setting the stage for something delicious. Here’s exactly what you’ll need:
- 1 tablespoon olive oil (or butter, if you prefer)
- 1 small onion, finely chopped (trust me, small pieces melt right in)
- 2 cloves garlic, minced
- 1 1/2 cups Arborio rice (uncooked) – This is non-negotiable for me!
- 1/2 cup white grape juice or extra broth (this adds that lovely bright note)
- 4-5 cups low-sodium vegetable or chicken broth, kept warm – I’ll explain why “warm” is the magic word in a sec.
- 1 cup fresh asparagus, cut into 1-inch pieces
- 1 cup fresh peas (thawed if frozen)
- 1 cup fresh spinach, roughly chopped
- 1/2 cup grated Parmesan cheese
- 2 tablespoons unsalted butter
- Salt and black pepper to taste
- 2 tablespoons chopped fresh parsley or chives for that final pop of green
Ingredient Notes and Smart Substitutions
Now, let’s talk about why these ingredients work and what you can swap if you need to. First, the star: Arborio rice. Its short, plump grains have a special starch that releases slowly, creating that signature creamy sauce. If you can’t find it, Carnaroli or Vialone Nano are great substitutes, but regular short-grain rice just won’t behave the same way.
The broth is your flavor base, so use a good one! I prefer low-sodium so I can control the saltiness. And that “kept warm” instruction? It’s crucial. Adding cold broth shocks the rice and makes the cooking process slow and uneven. Just keep a small pot simmering gently next to your main pan.
Parmesan isn’t just for flavor—it adds a silky, creamy texture when stirred in at the end. For the veggies, this is your canvas! Swap in chopped leeks instead of onion, or use fava beans or snap peas instead of asparagus. The goal is fresh, springy, and green. Have fun with it!
Essential Equipment for Spring Green Risotto
You don’t need anything fancy, but having the right tools makes the whole process so much smoother. It’s really just a few basics that you probably already have in your kitchen. Here’s my must-have list:
- A large, deep skillet or a Dutch oven: You need plenty of surface area for the rice to toast and room to stir without making a mess.
- A ladle: For adding that warm broth one perfect scoop at a time.
- A separate small saucepan: This is for keeping your broth warm on a back burner. It’s a game-changer, I promise!
- A wooden spoon: My favorite for stirring—it’s gentle on the rice and feels just right.
- A box grater: For fresh Parmesan. The pre-grated stuff just doesn’t melt the same way.
How to Make Spring Green Risotto: Step-by-Step Instructions
Alright, this is where the fun begins! Making risotto is like a little dance in the kitchen—it has a rhythm. Don’t be nervous! Just follow these steps and you’ll have the most beautiful, creamy Spring Green Risotto. The whole process takes about 30 minutes of active time, so put on some music and get ready to stir. The most important thing to do first? Get that broth warming in a separate pot. I can’t stress this enough—it makes everything go so much smoother.
Preparing Your Base and Toasting the Rice
Start by heating your olive oil in that big, deep skillet over medium heat. Add your finely chopped onion and let it cook, stirring now and then, until it turns soft and see-through. This takes about 5 minutes and builds a sweet, flavorful foundation. Next, stir in the minced garlic—just for a minute until you can really smell it. Ah, that’s the good stuff!
Now, pour in all the Arborio rice. This is a key moment! You’re going to stir it constantly for 2-3 minutes. The grains will start to make a faint clicking sound against the pan and turn a very light golden color at the edges. This toasting step seals the rice and helps it absorb liquid slowly later, which is the secret to a great texture. Just keep it moving so nothing burns.
The Key to Creaminess: Adding Liquid
Here’s where the magic happens. Pour in your white grape juice (or that first bit of extra broth). It’ll sizzle and steam—just stir until the liquid is almost completely soaked up by the hungry rice. This first addition wakes up all those flavors.
Now, grab your ladle and the pot of warm broth. Add just one ladleful of broth to the rice. Stir it in gently and pretty consistently. You don’t have to stir non-stop like a maniac, but don’t walk away either! Wait until most of that broth is absorbed before you add the next ladleful. This slow, patient addition is what coaxes the starch out of the rice, creating that luxurious, creamy sauce. It’s not hard, I promise—it’s just rhythmic.
Incorporating the Spring Greens
After you’ve been adding broth for about 15 minutes, the rice will be halfway cooked. This is the perfect time to stir in your asparagus pieces and peas. Just mix them right into the risotto and continue with your ladle-and-stir routine. The veggies will cook perfectly in the simmering mixture.
About 5 minutes later (so around the 20-minute mark total), stir in the chopped spinach. It wilts down in seconds! Now, keep adding broth and tasting. You’re looking for the rice to be tender but still have a tiny bit of firmness in the center—what chefs call “al dente.” The whole mixture should look creamy and loose, not stiff. If you run out of broth and need more liquid, just use hot water.
Finishing Your Perfect Spring Green Risotto
When the rice is perfectly cooked and creamy, take the skillet right off the heat. This is crucial! If the pan is too hot when you add the next things, the cheese can get stringy. Immediately stir in the grated Parmesan and the butter. Wow, watch it turn extra silky and rich right before your eyes!
Finally, season it with salt and a good crack of black pepper. Taste it! This is your moment. Does it need a pinch more salt? Maybe another sprinkle of cheese? Make it yours. Give it one final, loving stir, and it’s ready to serve. See? You did it!
Tips for the Best Spring Green Risotto
After making this more times than I can count, I’ve picked up a few little tricks that make a world of difference. Think of these as your secret weapons for risotto success!
- Warm broth is non-negotiable. I know I keep saying it, but it’s the #1 rule! Cold broth stops the cooking process dead in its tracks, leading to uneven, gummy rice.
- Stir with purpose, but don’t chain yourself to the stove. Frequent stirring releases the creamy starch, but it’s okay to step away for a few seconds between ladles. You just want to prevent sticking.
- Season right at the end. Broth saltiness varies, and reducing the liquid concentrates flavor. Always taste after you’ve added the cheese and butter, then adjust with salt and pepper.
- Let it rest for two minutes. Right after you finish stirring, cover the pot and walk away. This lets everything settle and the texture become absolutely perfect.
Serving and Storing Your Spring Green Risotto
Okay, you’ve made this beautiful, creamy masterpiece—now, let’s get it to the table! Spring Green Risotto is best when it’s fresh and hot, so I like to have my serving bowls warmed and ready to go. It’s such a versatile dish. You can absolutely serve a big, generous bowl of it as the main event for a vegetarian dinner, or it makes a stunning side dish for something special.
Ideal Serving Suggestions
For a simple, perfect meal, I love pairing this risotto with a light, lemony arugula salad. The peppery greens cut through the richness so nicely. If you’re serving it as a side, it’s fantastic with grilled chicken, a piece of lemony fish, or even some seared scallops. Don’t forget the garnish! A final sprinkle of those fresh chives or parsley, a little extra Parmesan, or a bit of lemon zest right on top makes it look (and taste) like it came from a fancy restaurant.
Storage and Reheating Instructions
Got leftovers? They’ll keep in a sealed container in the fridge for about 3 days. Now, reheating is key! The microwave is tempting, but it tends to turn the rice gummy and sad. My foolproof method is to gently warm it in a saucepan over low heat. Add a small splash of broth or water as you stir—this wakes the creaminess right back up. It might not be *quite* as perfect as day one, but it’s still wonderfully delicious for lunch the next day.
Spring Green Risotto Nutritional Information
I always get questions about the nutrition in this dish, and I think it’s great to have a general idea! But here’s my honest take: these numbers are always just a helpful estimate. The exact calories or sodium in your bowl can change depending on the brand of broth you use, how much cheese you stir in (I always add a little extra!), and the specific vegetables you choose.
In general, you’re looking at a satisfying, veggie-packed meal that gets its creamy richness from good ingredients like olive oil, butter, and Parmesan. It’s hearty comfort food that also makes you feel good because of all those beautiful greens. For the most accurate info, I’d suggest plugging your exact ingredients into your favorite nutrition calculator.
Common Questions About Spring Green Risotto
I get it—risotto can seem a little mysterious if you haven’t made it before! Over the years, I’ve answered the same few questions from friends again and again. So, let’s clear up the most common head-scratchers right here.
Can I use a different type of rice?
You really want a short-grain rice like Arborio, Carnaroli, or Vialone Nano. Their high starch content is what creates the creamy sauce. Long-grain rice like basmati or jasmine won’t release enough starch, so you’ll end up with a soupy rice pilaf instead of a luscious Spring Green Risotto.
How do I make this risotto dairy-free?
Absolutely! Just skip the Parmesan and butter at the end. To add creaminess, stir in a big spoonful of nutritional yeast or a splash of your favorite unsweetened, creamy non-dairy milk. The flavor will be different, but still totally delicious and bright from all the veggies.
What other vegetables work well?
Oh, have fun with this! The “spring green” part is your inspiration. Chopped leeks are amazing instead of onion. Try thinly sliced zucchini, fava beans, or even chopped artichoke hearts. Just remember: add harder veggies (like asparagus) earlier, and tender greens (like spinach or arugula) right at the end.
How do I know when it’s done cooking?
Taste it! The rice should be tender but still have a tiny bit of firmness in the center—not crunchy, but with a pleasant bite. The overall mixture should flow slowly when you stir it, like a thick, creamy soup. It should never look dry or stiff in the pan.
Why is my risotto not creamy?
Two likely culprits: the broth was cold, or you added it all at once. Adding warm broth slowly is what coaxes the starch out. Also, that final off-heat stir with butter and cheese is non-negotiable for that silky finish. Don’t rush it!

Spring Green Risotto
- Total Time: 45 minutes
- Yield: 4 servings 1x
- Diet: Vegetarian
Description
A creamy risotto made with fresh spring vegetables and Arborio rice. This dish celebrates seasonal produce with a bright, comforting flavor.
Ingredients
- 1 tablespoon olive oil
- 1 small onion, finely chopped
- 2 cloves garlic, minced
- 1 1/2 cups Arborio rice
- 1/2 cup dry white wine (substitute with white grape juice or vegetable broth)
- 4–5 cups vegetable or chicken broth, kept warm
- 1 cup fresh asparagus, cut into 1-inch pieces
- 1 cup fresh peas
- 1 cup fresh spinach, roughly chopped
- 1/2 cup grated Parmesan cheese
- 2 tablespoons unsalted butter
- Salt and black pepper to taste
- 2 tablespoons chopped fresh parsley or chives for garnish
Instructions
- Heat the olive oil in a large, deep skillet or Dutch oven over medium heat.
- Add the chopped onion and cook until soft and translucent, about 5 minutes.
- Add the minced garlic and cook for another minute until fragrant.
- Stir in the Arborio rice and cook for 2-3 minutes, stirring constantly, until the grains are lightly toasted.
- Pour in the white grape juice or broth and cook, stirring, until the liquid is mostly absorbed.
- Begin adding the warm broth, one ladleful at a time, stirring frequently. Wait until each addition is nearly absorbed before adding the next.
- After about 15 minutes of adding broth, stir in the asparagus and peas. Continue adding broth and stirring.
- After about 5 more minutes, stir in the chopped spinach. Continue cooking until the rice is tender but still slightly firm and the risotto has a creamy consistency. This takes about 20-25 minutes total.
- Remove the risotto from the heat. Stir in the grated Parmesan cheese and butter until melted and creamy.
- Season with salt and black pepper to taste. Garnish with fresh parsley or chives before serving.
Notes
- Keep your broth warm in a separate pot. Adding cold broth slows down the cooking process.
- Stir the risotto often to help release the rice’s starch, which creates the creamy texture.
- You can use other spring vegetables like chopped leeks, fava beans, or snap peas.
- For a richer flavor, you can finish with a squeeze of lemon juice.
- Prep Time: 15 minutes
- Cook Time: 30 minutes
- Category: Main Course
- Method: Stovetop
- Cuisine: Italian
Nutrition
- Serving Size: 1 1/2 cups
- Calories: 420
- Sugar: 5g
- Sodium: 850mg
- Fat: 12g
- Saturated Fat: 6g
- Unsaturated Fat: 5g
- Trans Fat: 0g
- Carbohydrates: 65g
- Fiber: 4g
- Protein: 12g
- Cholesterol: 25mg