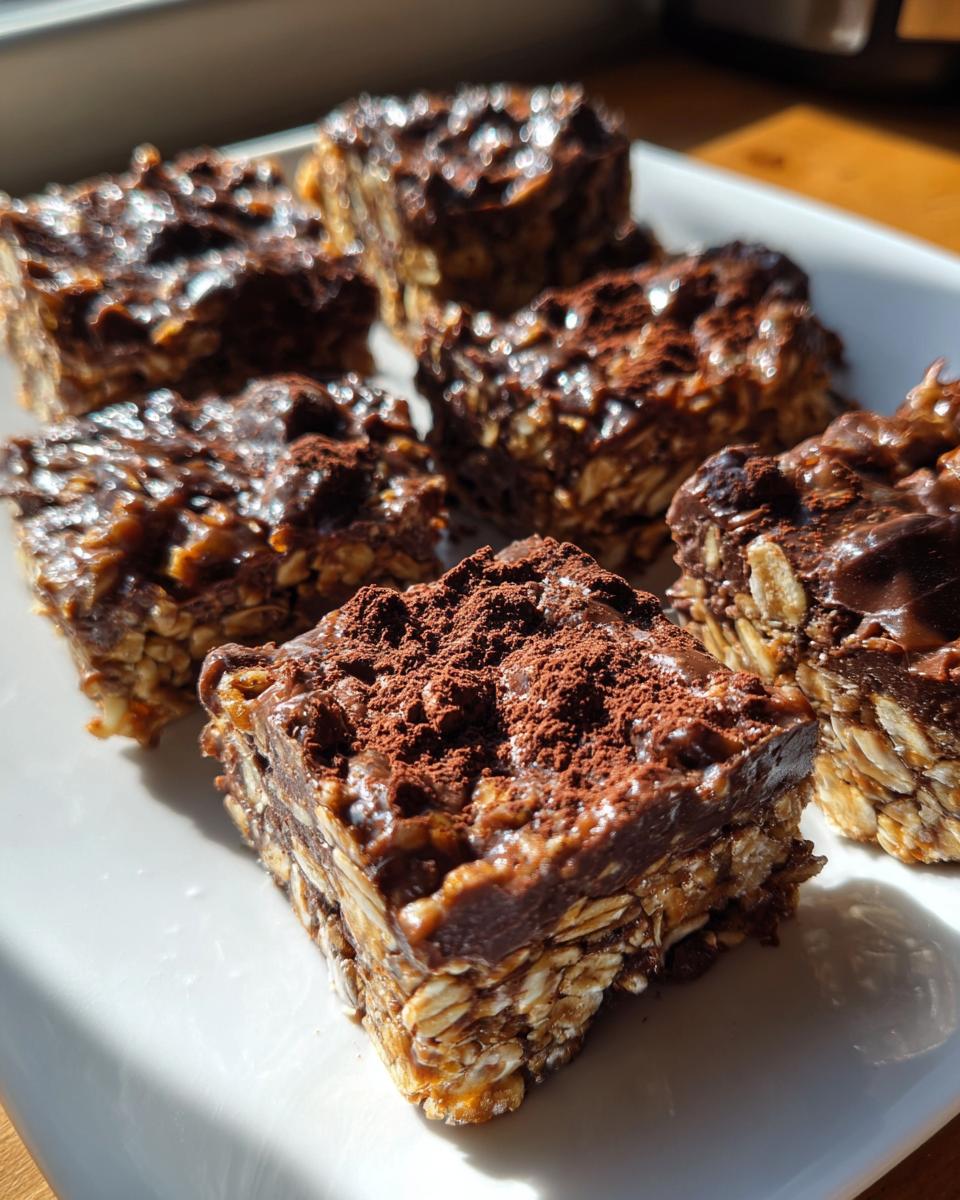
You know those mornings when you’re rushing out the door, lunchbox in hand, and realize you forgot to pack something good? Yeah, me too. That’s exactly why I fell in love with these oat-chocolate “lunchbox fuel” bars – they’ve saved my sanity more times than I can count. Just imagine: chewy oats, rich chocolate, and a touch of peanut butter all packed into one no-fuss snack.
What I love most is how these bars balance being crazy simple to make while actually tasting like dessert (shh, don’t tell the kids they’re getting fiber and protein). My niece calls them “energy cookies,” which honestly fits – they’ll power through school days just as well as they fuel my 3pm slump at work. And the best part? You probably have all the ingredients sitting in your pantry right now.
After years of testing recipes that claim to be “quick and healthy,” this one’s become my go-to. No baking required, minimal cleanup, and they keep wonderfully in the fridge. Whether you’re packing lunches or just need a smarter snack, these bars are about to become your new secret weapon.
Why You’ll Love These Oat-Chocolate Lunchbox Fuel Bars
Listen, I don’t blame you if you’re skeptical about “healthy” snacks tasting good – I’ve been burned by cardboard-like energy bars too many times. But trust me, these oat-chocolate bars are different. Here’s why they’ve earned a permanent spot in my kitchen:
- No oven required: Just mix, press, and chill. Perfect for when it’s too hot to bake or you’re short on time (hello, hectic weeknights!)
- Real energy boost: The combo of oats, peanut butter, and honey keeps hunger at bay way better than store-bought snacks
- Totally customizable: Swap peanut butter for sunflower seed butter, add coconut flakes, or toss in some mini M&M’s for fun
- Meal prep magic: One batch makes 12 bars that stay fresh all week – no more scrambling for lunchbox ideas
Honestly? They disappear so fast in my house I have to hide a few just for myself!
Ingredients for Oat-Chocolate Lunchbox Fuel Bars
Gather these simple ingredients – chances are, you’ve got most already! Just remember: quality matters here. Cheap peanut butter or stale oats won’t give you those amazing chewy-chocolatey results.
- 2 cups rolled oats (not quick oats – they get too mushy)
- 1/2 cup honey (pack it in the measuring cup for the full amount)
- 1/2 cup peanut butter (creamy works best, but almond butter’s great too)
- 1/4 cup cocoa powder (go for unsweetened – we’re adding sweetness elsewhere)
- 1/4 cup chocolate chips (mini chips distribute better, but chunks work too)
- 1 tsp vanilla extract (the real stuff, not imitation!)
- 1/4 tsp salt (just a pinch balances all the sweetness perfectly)
Nut allergy? No problem! Sunflower seed butter swaps in beautifully. And if you’re out of honey, maple syrup works – just reduce any added liquid slightly since it’s thinner.
How to Make Oat-Chocolate Lunchbox Fuel Bars
Okay, friends – let’s get mixing! These bars come together faster than you can say “where’s my snack?” Just follow these foolproof steps:
- Dry team first: In a big bowl, whisk together your oats, cocoa powder, and that pinch of salt. Breaking up any cocoa lumps now means smoother bars later.
- Stovetop magic: Warm the honey and peanut butter in a saucepan over medium-low heat. Stir constantly until it turns into this gorgeous, silky liquid – about 2-3 minutes max. Don’t let it bubble! (Burnt PB smells awful, trust me.)
- Vanilla’s moment: Pull the saucepan off heat and immediately stir in the vanilla. That heat unlocks vanilla’s flavor beautifully, but don’t skip this timing – boiling kills its magic.
- The big mix: Pour your warm PB mixture into the dry ingredients and stir with a sturdy spoon. At first it’ll seem too dry, but keep going! After 30 seconds, it transforms into this thick, fudgy dough.
- Chocolate finale: Fold in those chocolate chips while the mixture’s still warm – they’ll melt slightly for extra gooey pockets. Resist eating it straight from the bowl (hardest step, honestly).
Pressing and Setting the Bars
Line an 8×8 pan with parchment paper (overhang the sides for easy lifting). Dump in your mixture and press firmly with damp hands – this prevents sticking while creating an even layer. Chill for at least 1 hour before slicing; impatient cutting leads to crumbly bars!
Expert Tips for Perfect Oat-Chocolate Lunchbox Fuel Bars
Want to take your bars from good to “oh wow, you MADE these?” status? These little tricks make all the difference:
- Toast those oats! Spread them on a baking sheet at 350°F for 5 minutes until fragrant. It adds this incredible nutty depth that makes store-bought bars taste boring.
- Parchment is non-negotiable. That overhang isn’t just for looks – it’s your golden ticket to clean slices without a crumbly mess. I learned this the hard way after wrestling with a stuck pan.
- Wet hands = happy pressing. Dampen your fingers before pressing the mixture – suddenly it won’t stick to you at ALL. Game changer for getting those perfect corners.
- Chill time matters. I know, waiting stinks, but 1 full hour in the fridge sets everything properly. Slice too soon and you’ll swear the recipe doesn’t work.
Bonus trick? Use a pizza cutter for slicing – glides through those chocolate chips like butter!
Variations for Oat-Chocolate Lunchbox Fuel Bars
The beauty of these bars? You can tweak them a dozen ways without messing up the magic. Here are my favorite twists that keep things exciting:
- Crunch it up: Toss in 2 tbsp chia seeds or flaxseeds for extra omega-3s, or go wild with crushed pretzels for salty-sweet bliss
- Fruit boost: Dried cranberries or chopped apricots add chewy bursts (just keep them under 1/4 cup so the bars hold together)
- Allergy-friendly: Sunflower seed butter replaces peanut butter perfectly, and coconut oil works if you need nut-free and soy-free
- Double chocolate: Swap half the oats for cocoa rice cereal – my nephew’s obsessed with this version
Pro tip: Write down your combos! I once made an “everything but the kitchen sink” batch with coconut and almonds that disappeared before I could recreate it.
Storing and Serving Oat-Chocolate Lunchbox Fuel Bars
These bars are practically made for grab-and-go convenience! Store them in an airtight container between layers of parchment paper – they’ll stay fresh at room temperature for 3 days, or up to a week in the fridge (if they last that long). For freezer fans, they hold great for 2 months – just thaw overnight.
I like cutting them into 12 rectangles, but for little hands, 24 squares work better. No reheating needed – they taste amazing cold from the fridge or slightly softened in a lunchbox. Pro tip: Wrap individual bars in wax paper for instant lunch packing!
Nutritional Information for Oat-Chocolate Lunchbox Fuel Bars
Now, I’m no nutritionist (just a snack enthusiast!), but here’s the scoop on what’s packed into these oat-chocolate bars. Keep in mind these values are estimates – your exact numbers will vary depending on whether you use almond butter versus peanut butter, or toss in those extra chia seeds!
- Calories: 180 per bar
- Protein: 5g (thanks, peanut butter!)
- Fiber: 3g (those oats are working hard)
- Sugar: 12g (mostly from the honey – way better than refined sugar)
Not too shabby for something that tastes like dessert, right? The oats and nut butter give these bars staying power that’ll carry you through those mid-afternoon slumps.
Common Questions About Oat-Chocolate Lunchbox Fuel Bars
I get asked about these no-bake energy bars all the time, so let’s tackle the big questions that pop up most:
- “Can I freeze these bars?” Absolutely! They freeze beautifully for up to 2 months. I wrap them individually in plastic wrap first, then toss them in a freezer bag. Thaw overnight in the fridge or 30 minutes at room temp.
- “Why are my bars crumbly?” Usually means you didn’t press firmly enough or cut them too soon. Really pack that mixture down with damp hands, and wait the full hour to slice. If it’s still happening, try adding an extra tablespoon of honey next time.
- “Can I use quick oats instead?” I don’t recommend it – quick oats absorb too much moisture and turn mushy. Rolled oats give that perfect chewy texture that makes these bars special.
- “How do I make these vegan?” Easy swap! Use maple syrup instead of honey and vegan chocolate chips. The texture stays perfect – my plant-based friends rave about this version.
Still have questions? Shoot me a message – I’ve probably tested every possible variation of these bars by now!
Final Thoughts
Alright, snack warriors – it’s your turn! These oat-chocolate bars have been my lunchbox lifesavers for years, and I can’t wait for you to try them. Tag me if you make them (I wanna see your creations!) or tell me what mix-ins you used. Happy snacking, friends – may your afternoons be energized and your chocolate chips plentiful!
Print
Oat-Chocolate Lunchbox Fuel Bars
- Total Time: 1 hour 15 mins
- Yield: 12 bars 1x
- Diet: Vegetarian
Description
Energy-packed oat-chocolate bars perfect for lunchboxes or snacks.
Ingredients
- 2 cups rolled oats
- 1/2 cup honey
- 1/2 cup peanut butter
- 1/4 cup cocoa powder
- 1/4 cup chocolate chips
- 1 tsp vanilla extract
- 1/4 tsp salt
Instructions
- Mix oats, cocoa powder, and salt in a bowl.
- Warm honey and peanut butter in a saucepan until smooth.
- Stir in vanilla extract.
- Pour wet mixture into dry ingredients and mix well.
- Fold in chocolate chips.
- Press mixture into a lined pan.
- Refrigerate for 1 hour before slicing.
Notes
- Store in an airtight container for up to 1 week.
- Swap peanut butter for almond butter if needed.
- Add nuts or dried fruit for extra texture.
- Prep Time: 10 mins
- Cook Time: 5 mins
- Category: Snack
- Method: No-Bake
- Cuisine: American
Nutrition
- Serving Size: 1 bar
- Calories: 180
- Sugar: 12g
- Sodium: 85mg
- Fat: 7g
- Saturated Fat: 2g
- Unsaturated Fat: 4g
- Trans Fat: 0g
- Carbohydrates: 25g
- Fiber: 3g
- Protein: 5g
- Cholesterol: 0mg